Difference between revisions of "Accounts Module (Administrator guide)"
(→Cost Centres) |
|||
| Line 112: | Line 112: | ||
An example cost centre might look like this: | An example cost centre might look like this: | ||
| + | |||
| + | |||
| + | [[File:A_accounts_6.png|790px|border]] | ||
| + | |||
| + | |||
| + | The council one will be set up in a similar fashion, but using nominal code 20 for everything. Once these are set up you will have two new cost centres on your system ready for use, as shown. | ||
| + | |||
| + | |||
| + | [[File:A_accounts_7.png|border]] | ||
| + | |||
| + | |||
| + | |||
==View Invoices== | ==View Invoices== | ||
Revision as of 11:14, 6 March 2013
Contents
[hide]- 1 What is the Accounts Module?
- 2 Overview of the Accounts module
- 3 Assigning accounts codes
- 4 Cost Centres
- 5 View Invoices
- 6 List Invoices
- 7 Print Invoices
- 8 General Pre-Invoice List
- 9 HP Pre-Invoice List
- 10 SW Pre=Invoice List
- 11 Export Invoices
- 12 Export Payroll/Invoice Data
- 13 HP Material Costs
- 14 HP Project Labour Costs
- 15 HP Standard & Project Nominal Codes
- 16 Rates
- 17 Rates in Projects
- 18 Cost Centres
- 19 Invoice Layouts
- 20 Invoicing Parameters
- 21 Payment Methods
- 22 VAT Codes
- 23 General Charge Rates
- 24 General Rates in Projects
What is the Accounts Module?
If you're using the Handyperson Module, you will probably be using the simple accounting tools that it provides - namely, charging for materials and work done, automatically working this out to give a cash total on the job card, and producing reports about how much money has been spent/charged.
We soon found that some of our clients needed more accounting functionality. More and more organisations are having to account for exactly what they have done, and provide an invoice to (for example) the council, rather than just working under an SLA. Individual Budgets are also having an impact (where the client is given benefits/grants and has to purchase and manage their own care/services, rather than the care/services being provided to them with no money changing hands). The Accounts Module is the answer.
Using the Accounts Module you can:
- Automatically generate invoices for club/clinic activity (when using the Clubs and Clinics module), support work (when using the Support Worker Module), and handyperson services (using the Handyperson module).
- Create invoices to the client directly, or invoice a funder/organisation on their behalf.
- Print invoices directly from Charitylog.
- Export invoices directly from Charitylog to the industry-standard Sage Line 50 accounting package, with department and nominal codes automatically assigned.
Overview of the Accounts module
The accounts module is fairly separate to the rest of the system, which from the point of view of setup is a good thing, because end users don't usually have to worry about it. Usually, beside any activity which can be invoiced for, there will be a button which looks like a pile of coins. Clicking on this will let you see which charge rate is being used for the activity.
There is a lot of setup to be done for the accounts module to work correctly, but once this is done, there is minimal ongoing work, apart from printing the invoices and exporting the data.
The accounts module is intended to be used to invoice for work once it has actually been carried out, but with some careful thought, it can also be used to invoice for work in advance. Working out the best way to do this can be tricky and so you should discuss this with your assigned Charitylog trainer, and with the support department.
The accounts module can currently be applied to Club & Clinic activity, Support Worker work, or Handyperson activity. Clubs & Clinics is part of the Charitylog core; Support Worker and Handyperson are two of the available add-on modules for Charitylog. You should have good grasp of what these modules can do before setting up the accounts module to work with them. If you need to invoice for other activity, such as volunteer assignments, please give the support department a call. We plan to extend the accounts module at some point, and we depend on customer feedback to let us know what we need to develop.
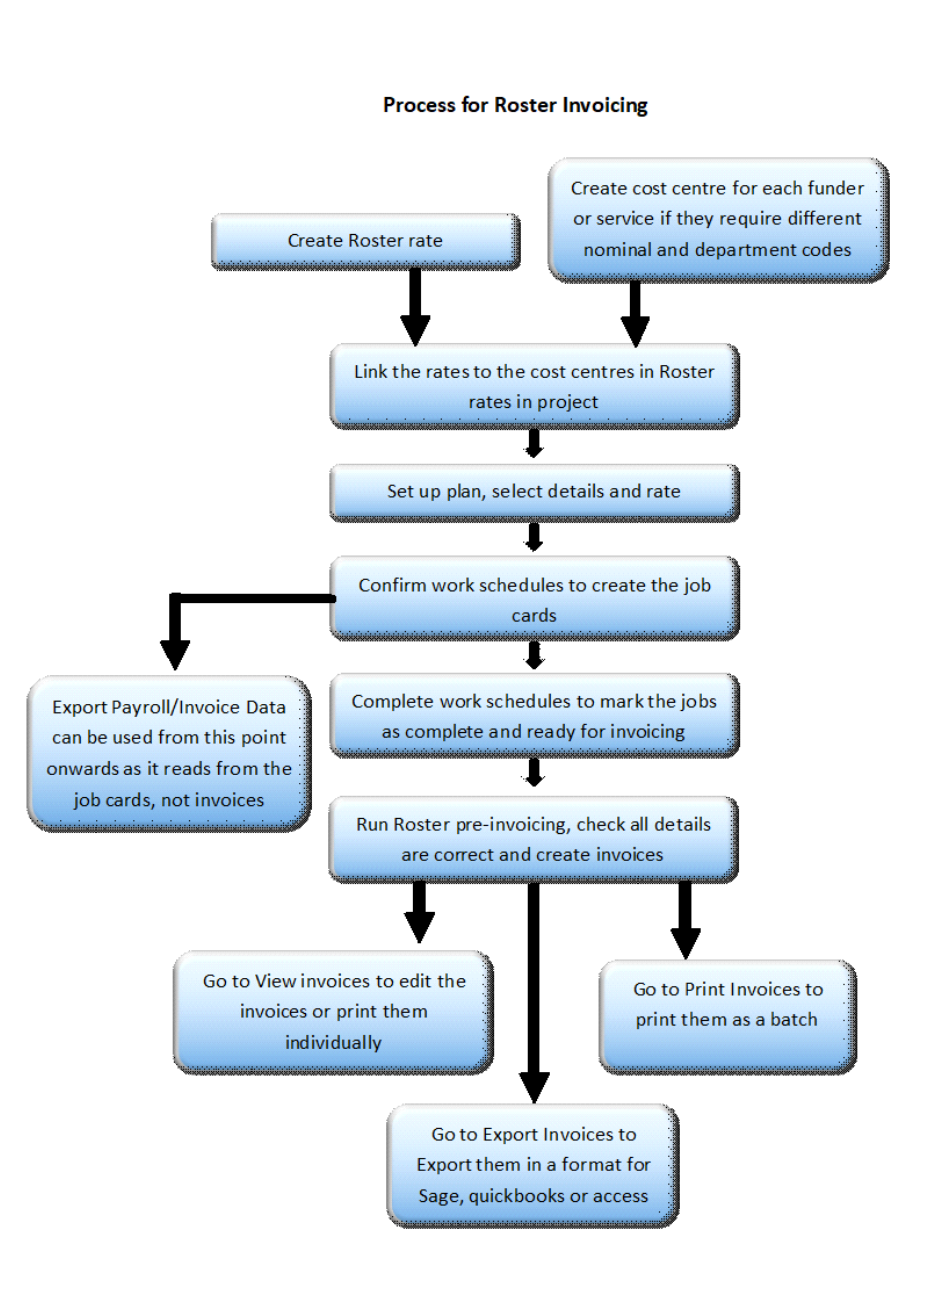
This flow chart shows the complete process, which we will use as the basis for this chapter.
Example set of nominal/department codes
As you set up the accounts module, you will need to enter department and nominal codes, which are a way of categorising activity and associated money. We will use the following set of example codes, and refer back to them throughout the guide.
Department codes
Daycare (private clients): 10
Daycare (council clients): 20
Nominal codes
General/other: 1000
Fixed charges and administration costs: 5000
Travel time: 7000
Mileage: 6000
Client mileage: 8000
Assigning accounts codes
The first thing you will need to do as part of the setup of the Accounts module is to assign customer IDs to anybody who is going to receive an invoice. You may already have an internal system for accounts codes, or they may be provided for you by a funding body.
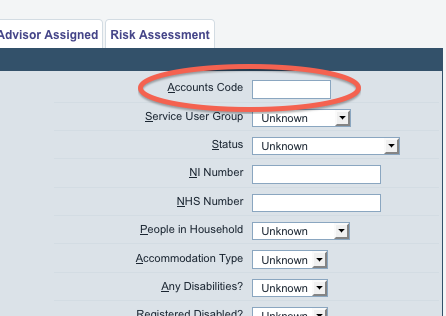
On the client details screen, there is a space for "Accounts code" on the Personal Details tab:
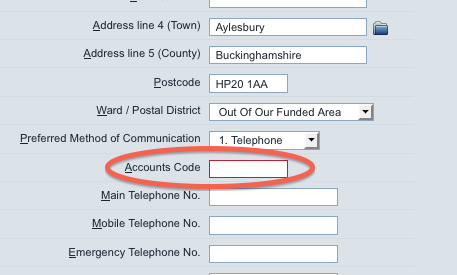
For funders, there is a similar field on the "General Details" tab of the Funder Details screen.
It is in a similar place on the Organisation Details screen.
Automatic accounts codes for people on your Charitylog system
If you do not have a preset system for assigning accounts codes, Charitylog will let you use People/Organisation IDs as your accounts codes, with a prefix if you want to apply one. This can be done in Operational Rules.
Cost Centres
Creating the cost centres is where you say how much is going to be charged for various things, and assign your department and nominal codes. There are separate cost centres for Handyperson, Support Worker and Clubs & Clinics. We will deal with them in turn.
Cost Centres for Clubs & Clinics
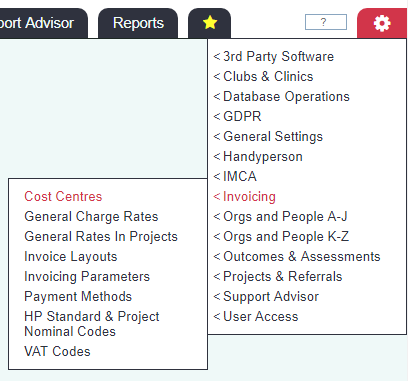
The Accounts menu (in standard form) has four submenus;
- Invoicing (containing the menu items for creating, printing and exporting your invoices)
- Support Accounts Setup (for setting up Support Worker-related accounting)
- HP Accounts Setup (for setting up Handyperson-related accounting)
- General Accounts Setup (for setting up general, i.e. Clubs And Clinics, accounting)
The menu item for Club and Clinic cost centres is in the "General Accounts Setup" submenu.
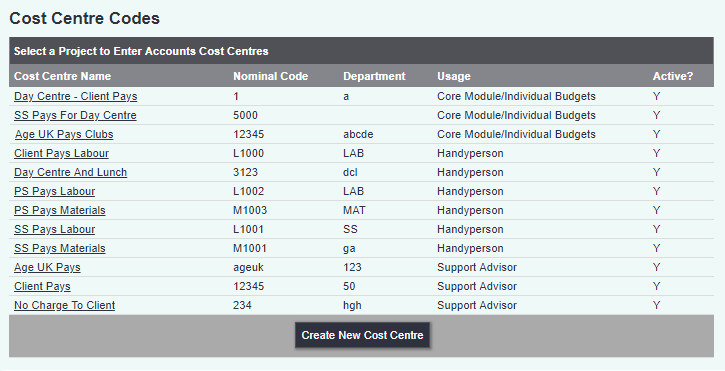
Clicking this menu item will take you to a screen where you can see the cost centres currently set up on your system, and enter new ones.
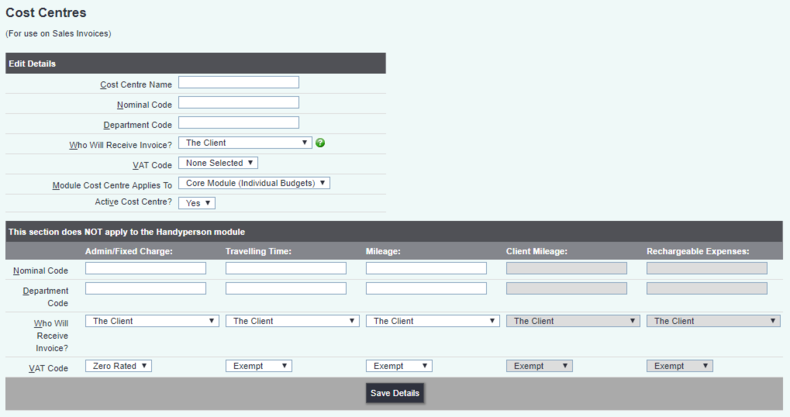
Click "Create New Cost Centre" and you will be taken to the following screen.
These screens, within the "Cost Centres" menu item, apply to all accounts activity.
The main purpose of the cost centre is to say who will pay for what, and to assign nominal and department codes to the activity. When specifying who pays, you will see a drop-down list of the people who have accounts codes set up on your system. When specifying the department and nominal codes; your finance office will be able to advise you on what to use. Click here to see the example set.
If you're simply using Charitylog to create your invoices, but not exporting to another accounts system, you may simply want to use placeholders like "dep" and "nom". You do need to enter something; the system will not create invoices with missing codes, unless you specifically tell it to do so.
To set up the codes, it makes sense to do so with a scenario in mind, so here is our example scenario.
Our organisation runs daycare centres, and uses Charitylog's Clubs and Clinics module to manage attendance at them.
Attendance at the centres is chargeable, but at two different rates.
Private clients (that pay for themselves) pay £20 per day.
Council clients pay £25 per day.
So there are two different people receiving invoices, and therefore you are going to need two Cost Centres. (It may turn out later that more are needed, to deal with other things, but a minimum of two will be required if we have two sets of people being invoiced.)
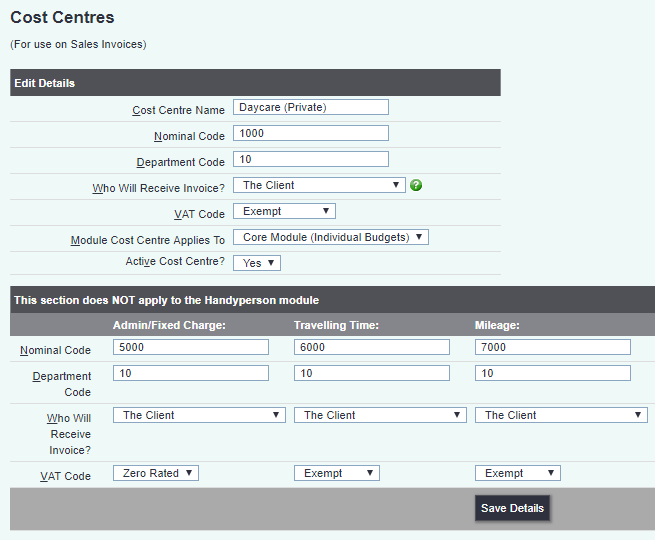
An example cost centre might look like this:
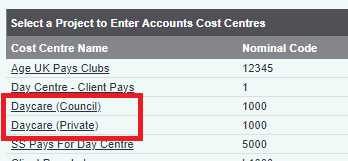
The council one will be set up in a similar fashion, but using nominal code 20 for everything. Once these are set up you will have two new cost centres on your system ready for use, as shown.

