Difference between revisions of "Volunteer Job Card Assignments"
(→Viewing Job Cards) |
(→The Job Card list) |
||
| Line 60: | Line 60: | ||
Click '''Contact Management > Volunteer Job Cards'''. | Click '''Contact Management > Volunteer Job Cards'''. | ||
| − | [[File: | + | [[File:vol_assign5.png|700px|alt="volunteer job cards button from contact management menu"]] |
This will show you the job cards on the system. Narrow the search using the fields across the top of the screen. Full details are on the [[Job Cards List]] page. | This will show you the job cards on the system. Narrow the search using the fields across the top of the screen. Full details are on the [[Job Cards List]] page. | ||
Revision as of 13:51, 6 February 2024
Note: This page uses "Client" and "Volunteer" throughout, but you can use Simple Assignments to assign staff as well. Staff and Volunteers can be assigned to any other organisation or person (even another Staff or Volunteer). Volunteer Assignments are a way of linking one person to another. The most common scenario is assigning a volunteer to someone to deliver a service - for example, assigning a befriending volunteer to someone who is socially isolated.
When a volunteer is assigned, a Job Card is created for the assignment. You can then print the job card on paper so that the volunteer can take it with them to the appointment. Once the work is done, and the job card is filled in, you can input this data onto the system and run reports on it.
Contents
Assigning volunteers to clients
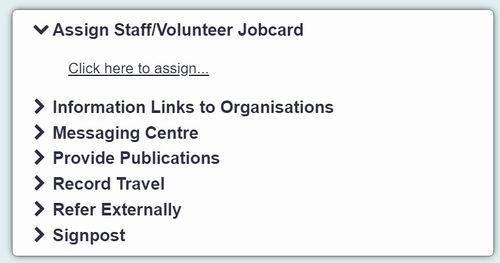
Assignments are made from the Record a Contact screen, while you're recording a contact with the client, by clicking the "Assign Staff/Volunteer" link in the Options section.
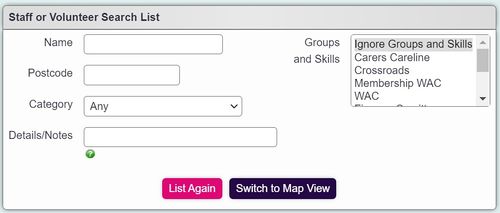
This will pop up a new page with the available volunteers. You can use the "Staff or Volunteer search list" section, in the top left, to narrow your search - enter the criteria and click "Search".
- TIP: This search works with the first half of a postcode, if you want to find a local volunteer.
- TIP: Use Groups and Skills here to quickly find suitable volunteers.
- TIP: You can use the 'Details' field to search the "Notes/General Description" section of the Staff or Volunteer records for useful matches.
Once you have found a suitable volunteer, click the "Assign" link next to their name.
- Current 'Usual Volunteer' Name - shows the Usual Volunteer if there is one set for this client and Project.
- This 'Selected Volunteer' Name - shows the volunteer you are about to assign.
- Enter Appointment Date and Time (if known) - enter the date and time of when the volunteer is going to see/work with the client. If you're going to use one job card per assignment, this could be the first appointment, or you could leave it blank. This appointment date will be printed out on the Printed Job Card.
- Usual Re-Assignment Interval - this only applies when using automatic follow-ups with one job card per appointment. This interval, given in days, will be used when setting up the next job card.
- Choose whether to make this volunteer the Usual Volunteer for this client and Project
When you click "Assign", you will be taken back to the Record A Contact screen. Enter work done/work to be done as normal. A Job Card has been created in the background, so you don't need to put anything in the text boxes about that - the system will have done it for you. Once you are done with the contact, click one of the "save and go to..." buttons as usual.
Viewing Job Cards
A Job Card looks like this.
- Top section - information about the work
- Middle section - space to enter data about the job card as a whole (description of work required, completion date, etc)
- Bottom section - space to enter timesheet records to show time spent on this assignment
The Job Card list
Click Contact Management > Volunteer Job Cards.
This will show you the job cards on the system. Narrow the search using the fields across the top of the screen. Full details are on the Job Cards List page.
Links at the bottom of the Client Details and Volunteer Details screens
Assuming they are turned on in Customise Orgs & People, there are links at the bottom of Client Details and Volunteer Details screens that will show you the job cards relating to that person.
In fact, these links simply take you to the Job Cards List page, but with "Vol. Support Worker or Staff Forename or Surname" or "Client Forename or Surname" filled in as appropriate, so that the page only shows you the job cards for that person.
Viewing Job Cards when using Automatic Follow-Ups
When you set up a Project, you can choose whether the Project should use Automatic Follow-Ups or not. If you use this feature, the system will help you create job cards in a "chain" using a data entry screen which will complete one job card and create the next one in a single step. Each time you complete one job card, you create the next one, and so on.
The Volunteering Diary
The Volunteering Diary is rather like the Action List but for volunteering appointments. Appointments only appear here if they have been created from a Project which is using Automatic Follow-Ups.
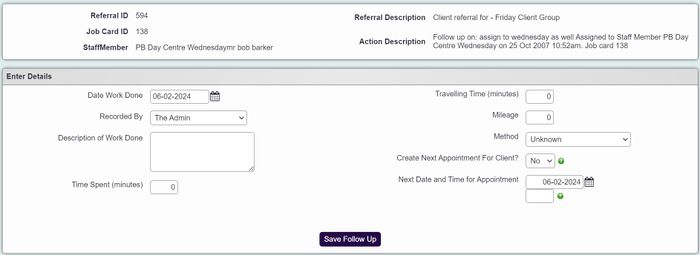
From the Volunteering Diary, rather than directly accessing Job Cards, you can access the Follow Up Details screen. This allows you to complete the job card, add a timesheet record, and create the next appointment, from one screen.
"Update" buttons
If the Project is using Automatic Follow-Ups, each time an appointment is made, the system will create a follow-up. This appears just like an outstanding Action, with an Update button on the client's History tab and also on the Action List of the person who made the assignment. Clicking one of these Update buttons will take you to the Follow Up Details screen.
Printing job cards
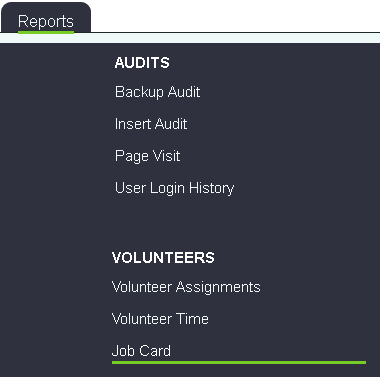
Use the "Job Cards" link in the "Reports" section of the menu.
You can print job cards for a date range, a certain volunteer, a certain job card number range, and more.
The job cards will print with page breaks automatically inserted in between. Your volunteers can now take these job cards with them to their appointments and use them to log their work and time spent (if they don't have access to the system themselves).
See Print Job Cards for full details.
Filling in Job Cards with volunteer timesheets
Use the "Volunteer Job Cards" link under the "Activity" column on the Contact Management menu.
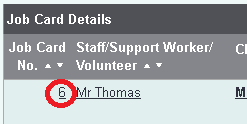
Access the job card itself by clicking on the job card number.
Use the "New Timesheet Records" button to add information to the job card (date, start and end time, and a description of the work done), then click "Save and Close". Alternatively, if you have several job cards to enter, you can do them all, using the "Save and Add Item" button after each one.
Once the client/volunteer assignment comes to an end, you can complete the job card by entering a date in the "Completed Date" box.

