Difference between revisions of "Power BI with Power Query"
(→Setting up our first API query directly in Power BI Desktop) |
|||
| (33 intermediate revisions by 3 users not shown) | |||
| Line 1: | Line 1: | ||
| − | This section requires Power BI skills and a knowledge of how | + | [[API Details| Go to API overview]] |
| + | |||
| + | This section requires Power BI skills, developer skills and a knowledge of how an API works. It may be useful to use an API Development tool to check the dictionaries and make test calls, Postman is a suitable tool for this. Power Query is used to call the API to retrieve the data. | ||
=What you will need= | =What you will need= | ||
| Line 8: | Line 10: | ||
*API Development tool (Optional) | *API Development tool (Optional) | ||
| − | = | + | =Creating a Query= |
| − | Here we are going to look at how to get started using the API and Power Query in Power BI | + | Here we are going to look at how to get started using the API and Power Query in Power BI. |
Open Microsoft Power BI Desktop and select get data. | Open Microsoft Power BI Desktop and select get data. | ||
[[File:PowerBI-getdata.png]] | [[File:PowerBI-getdata.png]] | ||
| + | |||
Power BI Desktop will then open and display the Get Data Menu. By default the All source menu will be selected. Scroll to the bottom of this list and select blank query and click Connect. | Power BI Desktop will then open and display the Get Data Menu. By default the All source menu will be selected. Scroll to the bottom of this list and select blank query and click Connect. | ||
| Line 21: | Line 24: | ||
| − | This will open the Power Query Editor and create Query 1. | + | This will open the Power Query Editor and create Query 1. On the menu ribbon in PowerBi Desktop select the advanced editor, to display the code editor. |
| − | + | ||
| − | + | [[File:PowerBI-AEribbon.png]] | |
| + | |||
| + | In the advanced editor we are going to create a query to get the available fields from the client endpoint. Below you will see what is required to get this information: | ||
| + | |||
| + | [[File:CFqeury.png]] | ||
| − | + | Copy below | |
| − | + | let | |
| − | let | + | URL = "https://api.dizions.co.uk/v2/clients/selectable_fields?resolveIds=[]ALL", |
| − | + | apiResults = Json.Document(Web.Contents(URL, [headers=[#"Source"="Enter_Key", #"Org"="Enter_Key", #"User"="Enter_Key"]])) | |
| − | + | in | |
| − | + | apiResults | |
| − | |||
| − | |||
| − | |||
| − | |||
| − | |||
| − | |||
| − | apiResults = Json.Document(Web.Contents(URL, [ | ||
| − | |||
| − | |||
| − | |||
| − | in | ||
| − | |||
You will be prompted that Information is required for the data privacy. | You will be prompted that Information is required for the data privacy. | ||
| Line 49: | Line 44: | ||
Click the check box to ignore privacy and select save. | Click the check box to ignore privacy and select save. | ||
| − | The query will then run and display a preview table of | + | The query will then run and display a preview table of the fields available from the client endpoint. |
| − | + | ||
| − | + | [[File:CFtable.png]] | |
| − | + | ||
| − | + | =Creating a Query to call data from the client endpoint= | |
| − | + | ||
| − | + | Here we are going to look at a second query. This query is going to call data from the client end point. This query will use objects to make the query easier to read and amend. We will also see how we can enter comments in a query. | |
| − | + | ||
| + | In the query editor select New Source on the ribbon and then blank query. | ||
| + | |||
| + | [[File:QEblankquery.png]] | ||
| + | |||
| + | On the ribbon in select the advanced editor, to display the code editor. | ||
| + | |||
| + | [[File:PowerBI-AEribbon.png]] | ||
| + | |||
| + | In the advanced editor we are going to create a query to get client ID's and names. | ||
| + | |||
| + | [[File:CFqeury2.png]] | ||
| + | |||
| + | You will then be displayed a list of records. From here we can then convert this to a table. Right click on the header called list and select 'To table'. On the following screen click ok. This will then create a table. Click on the expand icon to select the required fields. | ||
| + | |||
| + | [[File:CQtableexpand.png]] | ||
| + | |||
| + | You will then be displayed the data, ready to be used in Power BI once saved. | ||
| + | |||
| + | From this point you can start building your report dashboard within Microsoft Power BI. | ||
| + | |||
| + | Please note that we are unable to provide support on building Power BI reports, this product it supported by Microsoft. | ||
Latest revision as of 15:39, 14 August 2024
This section requires Power BI skills, developer skills and a knowledge of how an API works. It may be useful to use an API Development tool to check the dictionaries and make test calls, Postman is a suitable tool for this. Power Query is used to call the API to retrieve the data.
What you will need
In order to follow this section you will need the following;
- Dizions API Licence (Read Only or Full)
- Microsoft Power BI Professional licence
- Power BI Desktop installed
- API Development tool (Optional)
Creating a Query
Here we are going to look at how to get started using the API and Power Query in Power BI.
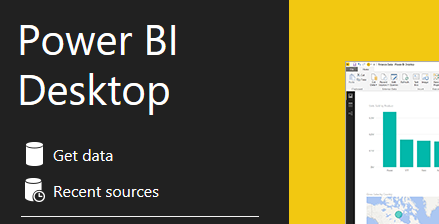
Open Microsoft Power BI Desktop and select get data.
Power BI Desktop will then open and display the Get Data Menu. By default the All source menu will be selected. Scroll to the bottom of this list and select blank query and click Connect.
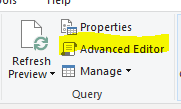
This will open the Power Query Editor and create Query 1. On the menu ribbon in PowerBi Desktop select the advanced editor, to display the code editor.
In the advanced editor we are going to create a query to get the available fields from the client endpoint. Below you will see what is required to get this information:
Copy below
let
     URL = "https://api.dizions.co.uk/v2/clients/selectable_fields?resolveIds=[]ALL",
     apiResults = Json.Document(Web.Contents(URL, [headers=[#"Source"="Enter_Key", #"Org"="Enter_Key", #"User"="Enter_Key"]]))
in
     apiResults
You will be prompted that Information is required for the data privacy. Click on continue. Click the check box to ignore privacy and select save.
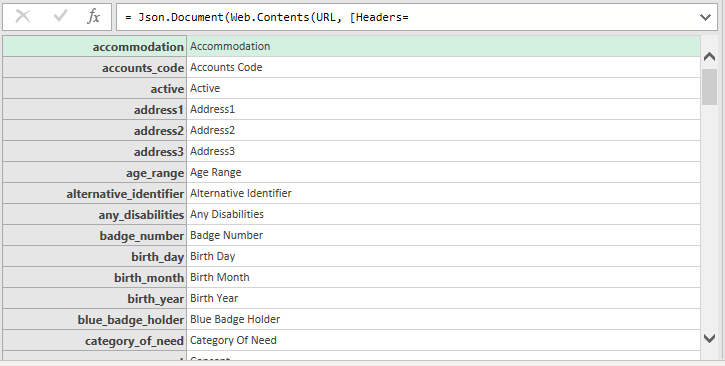
The query will then run and display a preview table of the fields available from the client endpoint.
Creating a Query to call data from the client endpoint
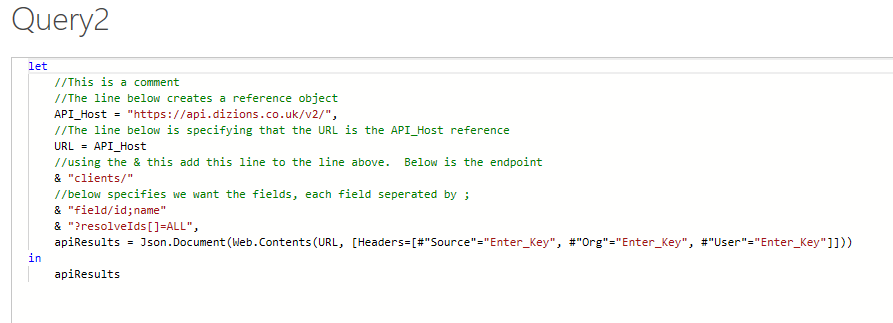
Here we are going to look at a second query. This query is going to call data from the client end point. This query will use objects to make the query easier to read and amend. We will also see how we can enter comments in a query.
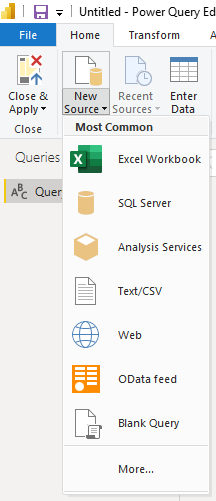
In the query editor select New Source on the ribbon and then blank query.
On the ribbon in select the advanced editor, to display the code editor.
In the advanced editor we are going to create a query to get client ID's and names.
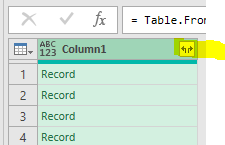
You will then be displayed a list of records. From here we can then convert this to a table. Right click on the header called list and select 'To table'. On the following screen click ok. This will then create a table. Click on the expand icon to select the required fields.
You will then be displayed the data, ready to be used in Power BI once saved.
From this point you can start building your report dashboard within Microsoft Power BI.
Please note that we are unable to provide support on building Power BI reports, this product it supported by Microsoft.
