Difference between revisions of "Information Links"
(→Print selected names and contact details) |
(→Info Link Letters) |
||
| (21 intermediate revisions by the same user not shown) | |||
| Line 1: | Line 1: | ||
Information Links are a way of categorising the organisations on your system so that you can find an appropriate organisation to signpost someone to, even if you do not know the full list of organisations that are available. | Information Links are a way of categorising the organisations on your system so that you can find an appropriate organisation to signpost someone to, even if you do not know the full list of organisations that are available. | ||
| − | |||
__TOC__ | __TOC__ | ||
| − | |||
==Accessing the Information Links feature== | ==Accessing the Information Links feature== | ||
| − | Clicking on the "Information Links" item in the "Options" section of the Record a Contact screen | + | Clicking on the "Information Links" item in the "Options" section of the Record a Contact screen will bring you to the Information Links lookup screen. |
| + | [[File:i_links1.JPG|600px|alt="a screenshot of the information links heading, on the right hand side of the record a contact page."]] | ||
| − | |||
| + | [[File:i_links2.JPG|600px|alt="a screenshot of the information links heading which has been dropped down, on the right hand side of the record a contact page."]] | ||
| − | |||
| + | You can now specify a main heading and a subheading to see which organisations might be suitable to signpost to. In the screenshot, a main category of "Furniture" has been specified, and then a subheading of "second hand furniture". | ||
| − | |||
| − | + | [[File:i_links3.JPG|600px|alt="a screenshot of the information links drop downs, displaying heading 1 as furniture and subheading as furniture (second hand)."]] | |
| − | |||
| − | |||
| − | |||
| − | |||
| Line 29: | Line 23: | ||
| − | |||
| + | [[File:i_links4.JPG|600px|alt="a screenshot of the information link that are selectable from the search. The results display an 'add to contact' button."]] | ||
| Line 42: | Line 36: | ||
Tick the boxes of the relevant organisations in the "Add to Record a Contact?" column: | Tick the boxes of the relevant organisations in the "Add to Record a Contact?" column: | ||
| − | + | [[File:i_links5.JPG|400px|alt="a screenshot of the information link that is selectable with a tick in the box labelled 'add to contact'."]] | |
| − | [[File: | ||
| − | |||
Then click the "Add to Contact" button. | Then click the "Add to Contact" button. | ||
| − | + | [[File:i_links6.JPG|300px|alt="a screenshot of the record a contact button."]] | |
| − | [[File: | ||
| − | |||
This will automatically write text in the "Details of Contact" box. | This will automatically write text in the "Details of Contact" box. | ||
| Line 60: | Line 50: | ||
Tick the boxes of the relevant organisations in the "Include In Printed List?" column: | Tick the boxes of the relevant organisations in the "Include In Printed List?" column: | ||
| − | + | [[File:i_links7.JPG|400px|alt="a screenshot of the 'printed list' button."]] | |
| − | [[File: | ||
| − | |||
Then click the "Print Selected" button. | Then click the "Print Selected" button. | ||
| − | + | [[File:i_links6.JPG|300px|alt="a screenshot of the record a contact button."]] | |
| − | [[File: | ||
| − | |||
This will print a list of the contact details for these organisations, as an Information Report, which you can print or email to the client. | This will print a list of the contact details for these organisations, as an Information Report, which you can print or email to the client. | ||
| − | |||
[[File:info_links8.PNG|400px]] | [[File:info_links8.PNG|400px]] | ||
| Line 78: | Line 63: | ||
| − | As well as allowing you to print out a list for the client, the Information Links feature also allows you to print out a pre-formatted letter to the client. This means that you can print an Information Links list but with some | + | As well as allowing you to print out a list for the client, the Information Links feature also allows you to print out a pre-formatted letter to the client. This means that you can print an Information Links list but with some pre-set text added, fields from the client record merged, and so on. |
This requires you to set up a standard letter template for the purpose with the information field merged in - which will appear like this in the letter template; | This requires you to set up a standard letter template for the purpose with the information field merged in - which will appear like this in the letter template; | ||
| Line 86: | Line 71: | ||
You will then need to set this particular letter template as an Info Link Letter Type. | You will then need to set this particular letter template as an Info Link Letter Type. | ||
| − | Once you have taken these two steps, you have the option of using the " | + | Once you have taken these two steps, you have the option of using the "One Step Find Selected, Set and Send" button before searching the information links. |
| + | This will take you straight to the letter creation page with the relevant information merged into the letter content. | ||
| − | [[File: | + | [[File:info_link11.PNG|600px]] |
| − | |||
| − | |||
| − | |||
| − | |||
| − | |||
| − | |||
| − | |||
| − | |||
| − | |||
| − | |||
| − | |||
| − | |||
| − | |||
| − | |||
| − | |||
| − | |||
| − | |||
| − | |||
| − | |||
| − | |||
| − | |||
| − | |||
| − | |||
| − | |||
| − | |||
| − | |||
Latest revision as of 15:05, 20 August 2024
Information Links are a way of categorising the organisations on your system so that you can find an appropriate organisation to signpost someone to, even if you do not know the full list of organisations that are available.
Contents
Accessing the Information Links feature
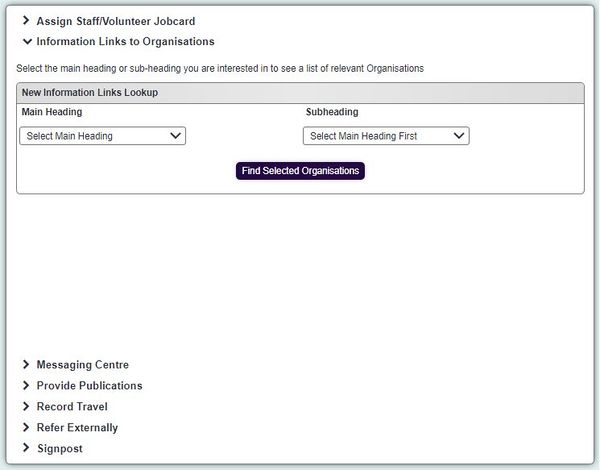
Clicking on the "Information Links" item in the "Options" section of the Record a Contact screen will bring you to the Information Links lookup screen.
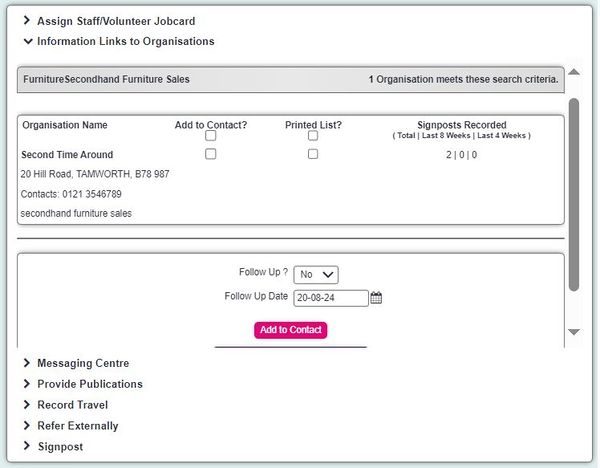
You can now specify a main heading and a subheading to see which organisations might be suitable to signpost to. In the screenshot, a main category of "Furniture" has been specified, and then a subheading of "second hand furniture".
Click on "Find Selected Organisations" to see the results of the heading/subheading that you have specified, along with extra functionality.
You now have options to:
Add the names of the organisation(s) to the Record a Contact text
You would use this if you are giving out the details of the organisation(s) to a client.
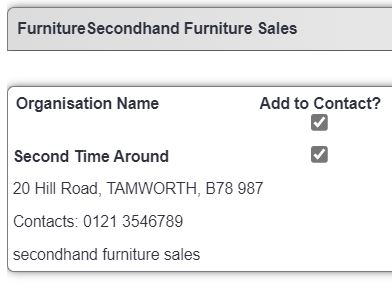
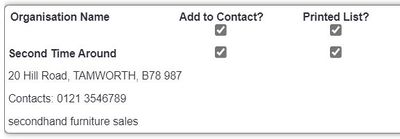
Tick the boxes of the relevant organisations in the "Add to Record a Contact?" column:
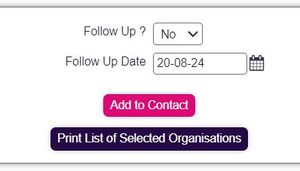
Then click the "Add to Contact" button.
This will automatically write text in the "Details of Contact" box.
Print selected names and contact details
This feature, and the "Print All Names" feature, can be used to print a list for the client of the names and contact details of the matching organisations.
Tick the boxes of the relevant organisations in the "Include In Printed List?" column:
Then click the "Print Selected" button.
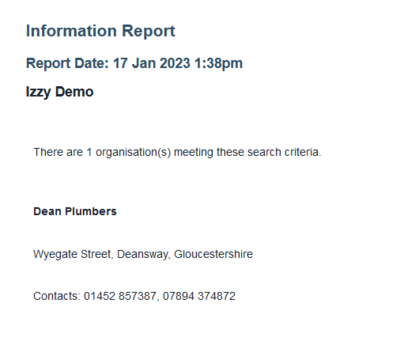
This will print a list of the contact details for these organisations, as an Information Report, which you can print or email to the client.
Info Link Letters
As well as allowing you to print out a list for the client, the Information Links feature also allows you to print out a pre-formatted letter to the client. This means that you can print an Information Links list but with some pre-set text added, fields from the client record merged, and so on.
This requires you to set up a standard letter template for the purpose with the information field merged in - which will appear like this in the letter template;
<<information>>
You will then need to set this particular letter template as an Info Link Letter Type.
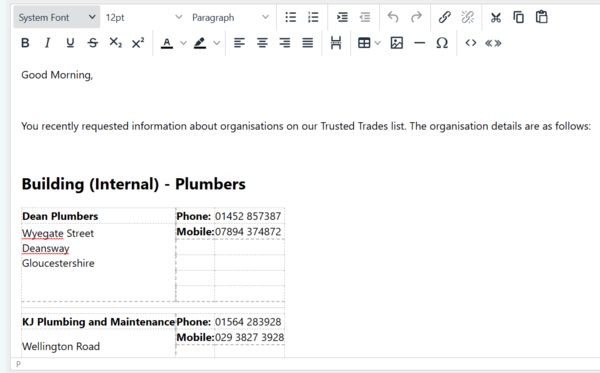
Once you have taken these two steps, you have the option of using the "One Step Find Selected, Set and Send" button before searching the information links.
This will take you straight to the letter creation page with the relevant information merged into the letter content.

