Difference between revisions of "Email settings for sending emails"
(→IP addresses) |
JoshCooper (talk | contribs) m (updated some descriptions) |
||
| Line 6: | Line 6: | ||
===Email Options=== | ===Email Options=== | ||
| − | There are 2 | + | There are 2 choices for sending emails: |
1) Using an external email client (e.g. Outlook). Clicking an email address simply launches Outlook's Compose window. No record of the email is kept in the system. No setup is required beyond setting "Enable Email" to Yes. | 1) Using an external email client (e.g. Outlook). Clicking an email address simply launches Outlook's Compose window. No record of the email is kept in the system. No setup is required beyond setting "Enable Email" to Yes. | ||
| Line 12: | Line 12: | ||
2) Using your own email servers. Emails are sent through your SMTP servers. A record of the email will appear on the recipient's record (recommended). Follow the instructions on this page to configure this. | 2) Using your own email servers. Emails are sent through your SMTP servers. A record of the email will appear on the recipient's record (recommended). Follow the instructions on this page to configure this. | ||
| − | + | Older systems may still be using the legacy option of using our servers. Due to email providers increasing SPAM protection we recommend upgrading to option 2. It is no longer possible to select this option if it is not already enabled. | |
===General Email Setup=== | ===General Email Setup=== | ||
| Line 20: | Line 20: | ||
[[File:Email_setup.png]] | [[File:Email_setup.png]] | ||
| − | 1) Note the Sending email address is the one | + | 1) Note the Sending email address is the one entered for the organisation in [[System Details|System Settings]]. |
2) Set 'Use external email client' to 'Use Charitylog'. | 2) Set 'Use external email client' to 'Use Charitylog'. | ||
| − | 3) Enter your organisation's email footer, disclaimer and legal text in the 'Email footer' box. | + | 3) Enter your organisation's email footer, disclaimer and legal text in the 'Email footer' box. This will be appended to the end of every email sent from Charitylog. |
| − | 4) Enter the | + | 4) Enter the SMTP server settings: |
SMTP Server Address (e.g. mail.example.com) | SMTP Server Address (e.g. mail.example.com) | ||
SMTP Server Username (e.g. noreply@example.com) | SMTP Server Username (e.g. noreply@example.com) | ||
Latest revision as of 13:51, 27 November 2024
See also Receiving_and_processing_emails
Contents
Email Options
There are 2 choices for sending emails:
1) Using an external email client (e.g. Outlook). Clicking an email address simply launches Outlook's Compose window. No record of the email is kept in the system. No setup is required beyond setting "Enable Email" to Yes.
2) Using your own email servers. Emails are sent through your SMTP servers. A record of the email will appear on the recipient's record (recommended). Follow the instructions on this page to configure this.
Older systems may still be using the legacy option of using our servers. Due to email providers increasing SPAM protection we recommend upgrading to option 2. It is no longer possible to select this option if it is not already enabled.
General Email Setup
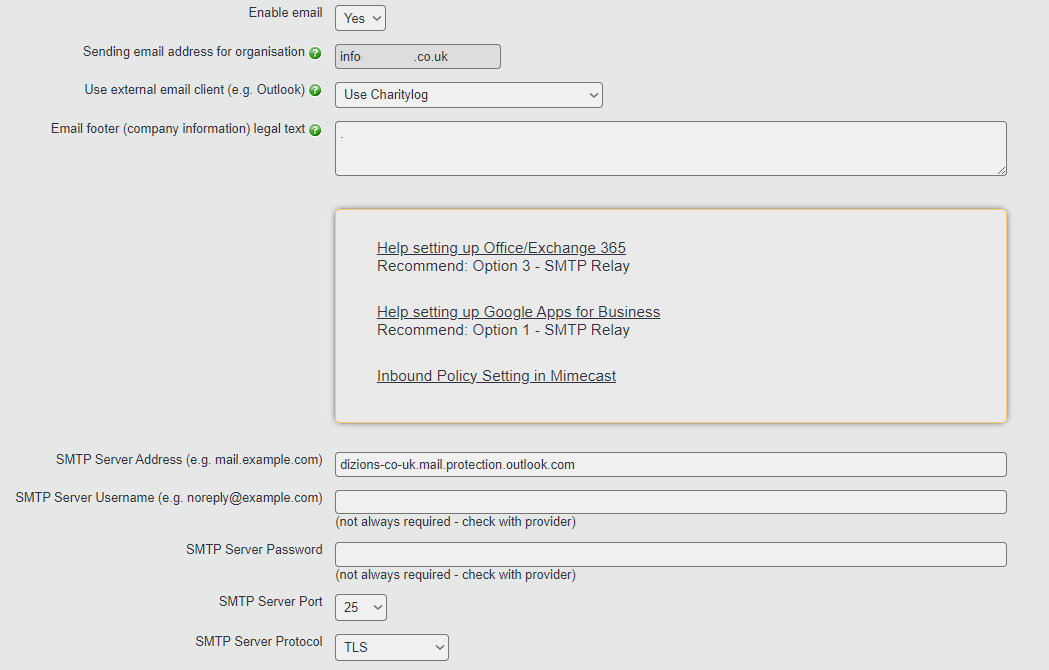
1) Note the Sending email address is the one entered for the organisation in System Settings.
2) Set 'Use external email client' to 'Use Charitylog'.
3) Enter your organisation's email footer, disclaimer and legal text in the 'Email footer' box. This will be appended to the end of every email sent from Charitylog.
4) Enter the SMTP server settings:
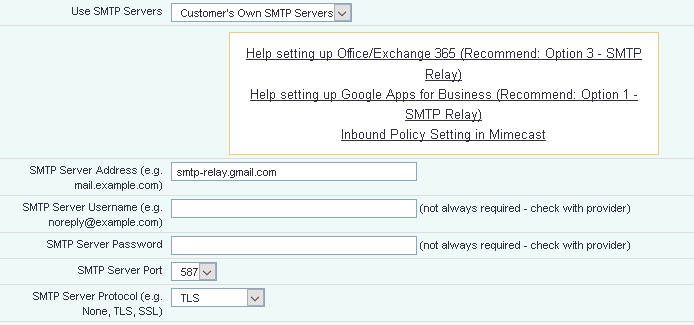
SMTP Server Address (e.g. mail.example.com)
SMTP Server Username (e.g. noreply@example.com)
SMTP Server Password
SMTP Server Port
SMTP Server Protocol (e.g. None, TLS, SSL)
Specific Instructions for Office 365
If you use Microsoft Office 365 you will need to add an email connector on your Exchange online admin centre.
Log in to Microsoft Office 365 and then click on the Admin Icon.
On the menu click on the down arrow next to Admin Centers and Click Exchange.
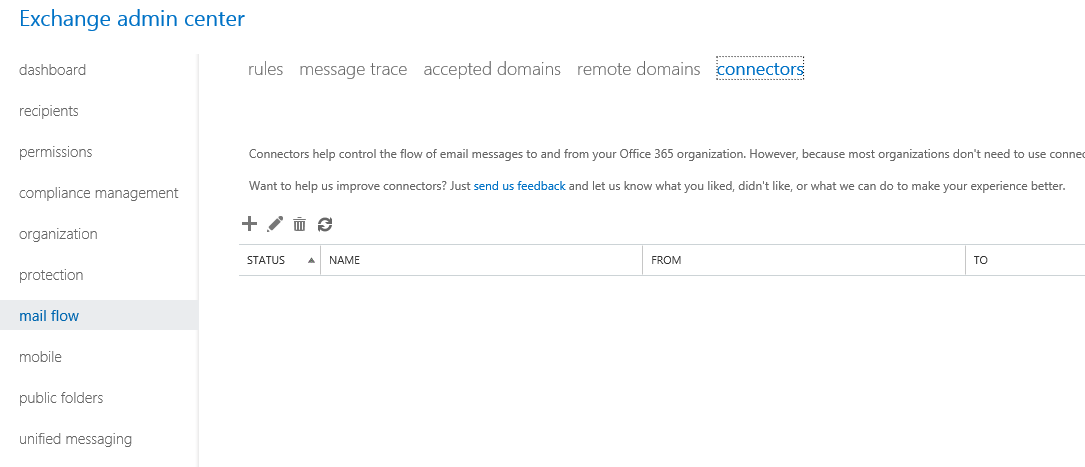
In the Exchange Admin centre select mail flow and click on connectors across the top of the page. Click on PLUS '+' icon to add a connector.
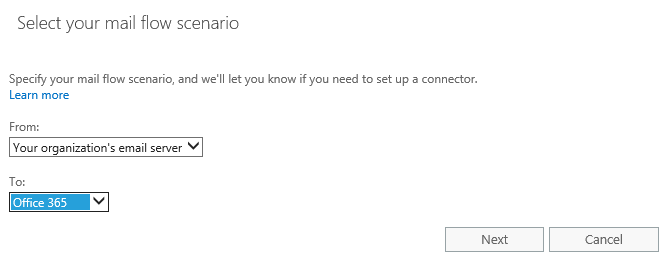
Choose the following scenario;
From: Your organization's email server
To: Office 365
Click on Next to Continue.
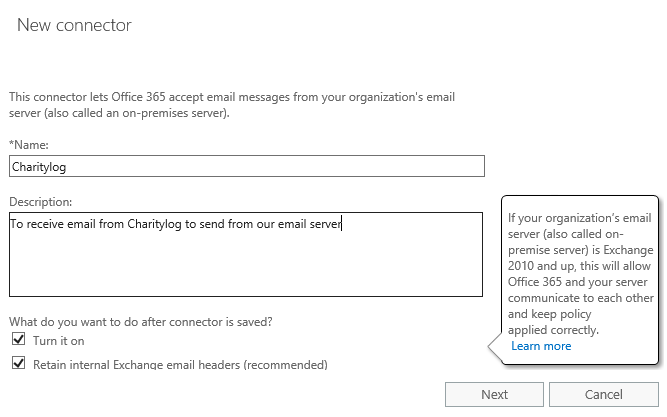
Give the connector a name (required) and a description (optional), leave the 'Turn it on' and 'Retain internal Exchange email headers (recommended)' options ticked and click next.
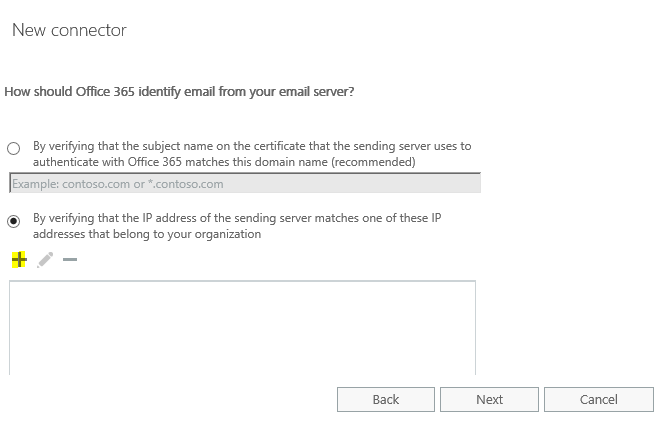
On the following screen you will need to select the option 'By verifying that the IP address of the sending server matches one of these IP addresses that belong to your organization.
Use the PLUS '+' icon to add the IP addresses.
Click next and then Save on the confirmation page.
You will then need to configure the system settings (see above). The SMTP address will be unique to your organisation. If your email address domain is @mycharity.org.uk then you would need to use
mycharity-org-uk.mail.protection.outlook.com
See below for an example;
You can then use any valid Office 365 username and password.
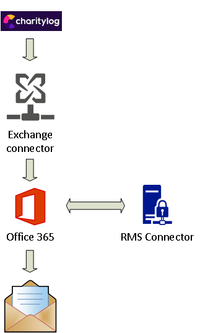
Many organisations require end to end email encryption. Using Charitylog, Microsoft Office 365 Email and Microsoft Office Rights Management this can be achieved. You will require Azure Information Protection for Office 365 (Please consult your IT team or 365 admin panel for details). Following the above instructions will connect your Charitylog system to Office 365. In the Azure Information Protection section you would set up your protection labels (templates and use the Exchange admin centre to set transport rules for emails from the IP addresses.
Specific Instructions for Gmail
1) You will require a corporate account and Gsuite.
2) Follow [these instructions] to setup a new SMTP relay.
3) You will need to specify a sending IP address
4) Ensure that 'require SMTP authentication is NOT selected
5) Select Require TLS encryption.
6) In our email settings page, set the following:
Instructions for Other Providers
The setup will probably be broadly similar to the ones above. Please contact your service provider.
IP addresses
Your provider may ask you to enter the IP Addresses used by our application. Please enter all of these:
13.42.72.139
3.9.155.126
18.132.80.157
18.135.235.31


