Difference between revisions of "Sexual Orientations"
From Charitylog Manual
| (4 intermediate revisions by 3 users not shown) | |||
| Line 1: | Line 1: | ||
[[File:helpheader_small.png|right]] | [[File:helpheader_small.png|right]] | ||
| − | |||
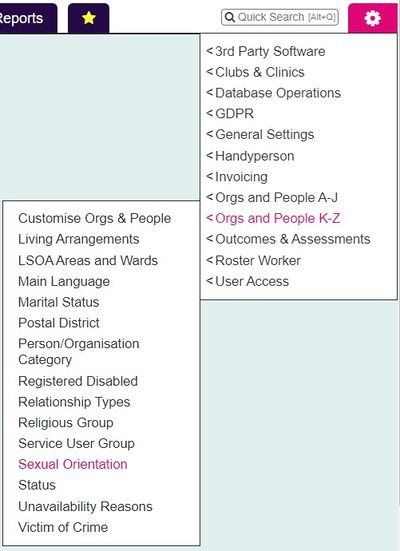
| − | [[File: | + | [[File:so1.JPG|400px|alt="a screenshot of the sexual orientation button, highlighted in the admin menu."]] |
| + | ==Creating/Editing== | ||
| − | + | Click on an existing otion to edit it or click the 'Enter New Orientation' button to create a new one. This option can also be re-named using the [https://wiki.dizions.co.uk/index.php/Terminology Terminology] function. | |
| − | + | You can now enter/edit the following details: | |
| − | + | * Sexual Orientation Name | |
| − | |||
| − | |||
| − | |||
| − | |||
| − | |||
| − | |||
| − | |||
| − | |||
| − | |||
| − | |||
| − | |||
| − | |||
| − | |||
| − | |||
| − | |||
* Notes (for information on this screen only; these notes are not output on any report) | * Notes (for information on this screen only; these notes are not output on any report) | ||
| − | * [[Display Order]] | + | * [[Display Order]] in the drop down list |
| − | * Active? - whether this | + | * Active? - whether this Sexual Orientation is to be available for use on the system or not |
| − | Click | + | Click the 'Save Details' button to continue. |
| − | + | ==Merging== | |
| − | + | You can merge Sexual Orientations together if you wish to reduce your options. This will also update any record using the statuses. To merge follow the steps below; | |
| − | + | # Click on the first status | |
| − | + | # Click the 'here' link (Click here to Sexual Orientations) If you wish to change the details of the record you have selected, this need to be saved first. | |
| − | + | # Select the Status you wish to merge in the drop down list. | |
| − | + | # Click the 'Merge Data' button. | |
| − | + | # Click 'cancel' to abort the change or 'OK' to continue. '''This cannot be undone!''' | |
| − | |||
| − | |||
| − | |||
| − | |||
| − | |||
| − | |||
| − | |||
| − | |||
---- | ---- | ||
| − | + | [[File:helpheader_small.png|right]] | |
| − | [[ | ||
Latest revision as of 14:00, 20 September 2024
Creating/Editing
Click on an existing otion to edit it or click the 'Enter New Orientation' button to create a new one. This option can also be re-named using the Terminology function.
You can now enter/edit the following details:
- Sexual Orientation Name
- Notes (for information on this screen only; these notes are not output on any report)
- Display Order in the drop down list
- Active? - whether this Sexual Orientation is to be available for use on the system or not
Click the 'Save Details' button to continue.
Merging
You can merge Sexual Orientations together if you wish to reduce your options. This will also update any record using the statuses. To merge follow the steps below;
- Click on the first status
- Click the 'here' link (Click here to Sexual Orientations) If you wish to change the details of the record you have selected, this need to be saved first.
- Select the Status you wish to merge in the drop down list.
- Click the 'Merge Data' button.
- Click 'cancel' to abort the change or 'OK' to continue. This cannot be undone!

