Difference between revisions of "Restricted IP Addresses"
From Charitylog Manual
| Line 5: | Line 5: | ||
Click on Enter New IP Address to add to the whitelist (acceptable IP address) | Click on Enter New IP Address to add to the whitelist (acceptable IP address) | ||
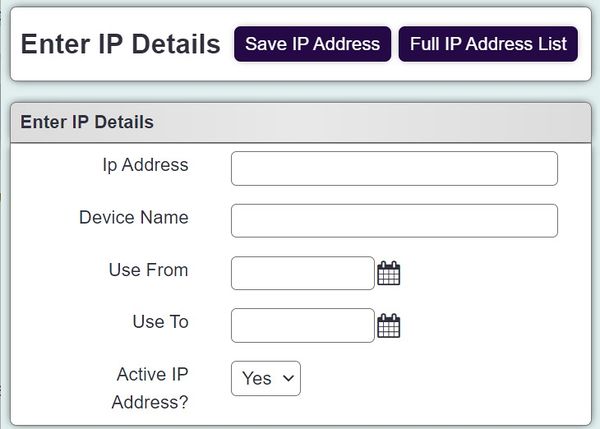
| − | [[File:ip_add1.jpg| | + | [[File:ip_add1.jpg|600px|alt="a screenshot of the IP addresses entry page. This is where you input the IP address that you want the user to be restricted to logging in from."]] |
Complete the following; | Complete the following; | ||
Latest revision as of 13:52, 1 May 2024
Restricted IP Addresses are used to Whitelist locations, restricting users to only login from these locations. It is recommended that the user has a dedicated IP address (allocated to the office or home internet connection). Each Security Group can be restricted to a dedicated IP address (whitelisted) that is known to be secure.
Click on Enter New IP Address to add to the whitelist (acceptable IP address)
Complete the following;
- Ip Address - This is the dedicated IP (Internet) Address for the location to whitelist.
- Device Name - This is the name of the device or location, this will be the name seen when adding to the [[Group Access|Security Groups Use *From - Leaving the date blank will keep the device/location active. If you set a from date group assigned this address will only be able to access the system after this date.
- Use To - Leaving the date blank will keep the device/location active. If you set a to date group assigned this address will only be able to access the system before this date.
- Active IP Address? - If this device/location is required or not.
Click save to add the IP Address to the whitelist.
To allocate the IP Address see Group Access.

