Difference between revisions of "Support Worker Module"
m |
m |
||
| Line 2: | Line 2: | ||
The Support Worker module is one of the optional extra modules which can be added to the system. The module allows clients to have support plans created, involving one or many support workers and one or many types of activity. The Support Worker module also links to the invoicing module, making it possible to charge for support work delivered, produce invoices and export to an accounts system. | The Support Worker module is one of the optional extra modules which can be added to the system. The module allows clients to have support plans created, involving one or many support workers and one or many types of activity. The Support Worker module also links to the invoicing module, making it possible to charge for support work delivered, produce invoices and export to an accounts system. | ||
| − | The webinar below gives | + | The webinar below gives an overview of the whole process. Additional information is below. |
{{#ev:youtube|42vORVWVGps|790}} | {{#ev:youtube|42vORVWVGps|790}} | ||
Revision as of 11:06, 21 September 2020
The Support Worker module is one of the optional extra modules which can be added to the system. The module allows clients to have support plans created, involving one or many support workers and one or many types of activity. The Support Worker module also links to the invoicing module, making it possible to charge for support work delivered, produce invoices and export to an accounts system. The webinar below gives an overview of the whole process. Additional information is below.
Contents
[hide]
Support Worker terminology
Depending on your organisation, you might not call these people "Support Workers". The module allows you to change the wording across the whole system so that you can call them anything you wish. However, "Support Worker" is the most commonly used terminology and so this manual is written assuming that this is what you're using.
Further information
This is the User Manual, and so we won't deal with some of the more involved setup behind the module. If you'd like more information on how to set up and manage the Support Worker module, please have a look at the Support Worker Module (Administrator guide). The Administrator guide deals with:
- Setting up Support Workers on the system in the first place
- Parameters (including the terminology - "Support Workers", "Home Helpers", etc)
- Time availabilities of Support Workers
- Matching Exclusions
- Reporting
Searching for Support Workers
The Support Worker module has its own search for Support Workers, which works in exactly the same way as the client search (or any other search for organisations/people). It can be found by clicking the "Support Advisor Details" menu item.
For more information on what's stored on the Support Advisor page, see Support Worker Details
How to use the Support Worker module (part 1)
The process of working with a client within the Support Worker module is illustrated by this flowchart:
- First of all, the system needs to know that this person is active in the relevant project and needs a support plan creating. The way you do this is simply to Record a Contact within a project which is set up to use the Support Worker module.
- Ongoing work will be handled by the support plan, so you don't necessarily need to enter anything in the bottom half of the "Record a Contact" screen. For example, you don't need to schedule the first appointment with the client there. However, you may well want to use it to refer the client to the relevant member of staff to have a support plan created - if that member of staff is not you - or to enter a follow up action to see how the client is doing, 3 months on (for example).
- Usually, it is not appropriate to have the system automatically create support plans every time a referral is started within the project, because there are eligibility checks to be done before deciding that the client will definitely receive the service. If this is the case, you will see a red bar across the middle of the "Record a Contact" screen, with a box to select whether you would like to create the support plan now, or later.
Once the required checks have been done and it is decided that the client will receive the service, this can be set to "yes" before using one of the "Save and go to" options at the bottom of the screen. This will create a blank support plan on the system for that client.
Creating the support plan
- You now need to fill in the blank support plan for the client. To access the support plan, click on the "Go to Support Plan" button from the relevant referral on the client's History tab.
This will display the blank support plan.
You can now enter the following:
Overall plan information
- Support Team: if your Support Workers are split into teams, enter the relevant team here.
- Hours per week and total hours agreed
Information about specific activities within the plan
- Service: one of the services set up on your system by your administrators.
- Start date and end date (start date must be filled in, end date is optional)
- Rate selection (only appears if you are using the invoicing module)
- Interval, day of week/date: use these boxes to set up how often you want the activity to happen.
- Start time, duration (minutes): when the activity starts and how long it takes.
Once you have filled in these details, click the "Save Details" button at the bottom of the plan. The "people" icon on the right of the "Usual Support Advisor" box should turn from grey to blue.
- Usual Support Advisor: click the "blue people" icon to the right of this box to assign a Support Worker.
Selecting a Support Worker
You should now see the following screen:
Depending on the times you have selected, the system will show you the available support workers. You may see a blue "stop" sign next to one or more support workers' names. This is because the system stores details of when they are available for work, and in theory they are not available for the time that you are booking for.
You can also show the "Lookup/Search Criteria" section to search these Support Workers. You can search the available Support Workers by surname, first address line, town, postcode, telephone number, email address, details (a text field on the Support Worker Details screen) or by groups and skills - or any combination of these.
There is also the option to see the available Support Workers displayed on a map (though this requires them to have a valid postcode entered on their Support Worker Details screen). This can be useful for making assignments where geographical location is important - for example, helping with shopping etc. You can also display the support workers on a calendar view but this is not intended for making assignments - rather, it's for viewing the activity of your support work department as a whole, and moving existing appointments.
Once you have selected the Support Worker you want to use, click the "Use" button.
Running the Support Plan
Confirm Work Schedules
Your client will now have a "Yes" in the "Support Plan Done?" column on the "Support Plans" page. This means that the system knows what the plan is, but you now need to tell the system that the appointments resulting from that plan are actually going to happen. We call this "Confirm Work Schedules", which has its own menu item.
Clicking this menu item will take you to the following screen:
Here you can specify which support work schedules you want to confirm, narrowing your search by:
- Start and end date
- Project
- Support team
- Particular clients
- Particular support workers
- Whether to check for overbookings (double bookings).
Select the options you want and click "Continue". The system looks at the date range you have given and the support plans that are set up, and puts the two together to give a list of possible appointments.
You will be taken to a screen that shows all of the appointments resulting from your selection. Note - this screen shows appointments, not support plans, so if you have support plans with lots of activities on them, they will get a line each. There are some summary details which you can check for correctness, and you also have the opportunity to change the charge rate for one particular appointment (which is unusual) or reassign the appointment to another Support Worker (more common).
Once you are happy that everything is OK, tick the "confirm" box on each line to be confirmed (or use "Tick box to mark all as confirmed") and click "Update & Create Confirmed Jobs". In the screenshot, I am creating three weeks' worth of appointments - one counselling appointment each week at 0900 on Monday.
At this point you are taken back to the "Confirm Schedules" page, and the appointments you previously specified have been confirmed.
So now the system knows that the appointments are going to happen. At some point this work will be done, and you will need to let the system know about this too - but first, there is plenty of useful functionality that you can make use of.
Functionality post-confirmation, pre-completion
Support Advisor Work Diary
The Support Advisor Work Diary is rather like an Action List for SW appointments, and is particularly useful for the Support Workers to look at their upcoming work. The screenshot shows the diary with the options adjusted to show the appointments confirmed above.
Support Advisor Calendars
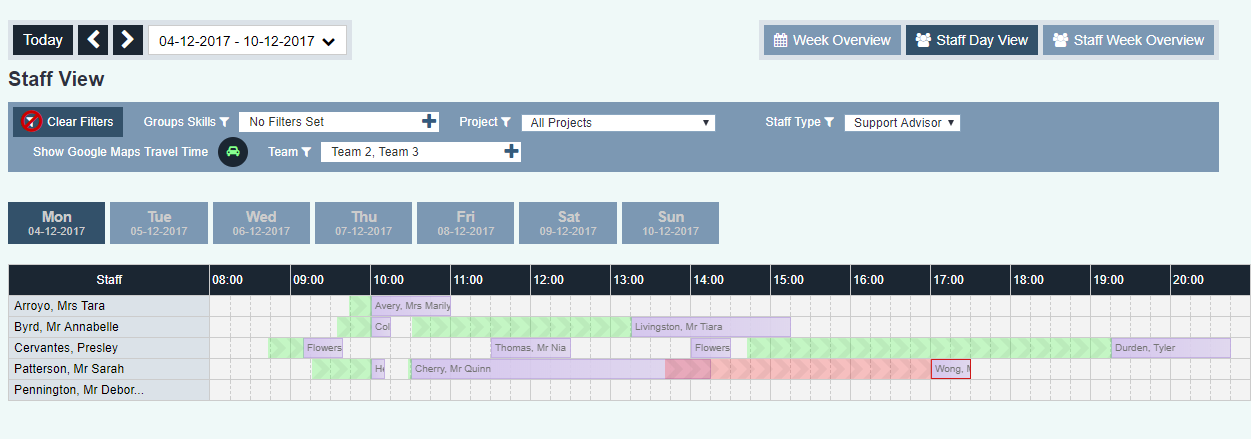
The Support Advisor Calendars provide a useful alternative view of the appointments lined up - a graphical view rather than a list of results. If you are familiar with Google or Outlook calendars, this calendar is structured in a similar way.
Clicking "Support Advisor Calendars" will take you to the following screen, from where you can select the calendar you want to view.
Support Advisors (for All/Every Active Worker) shows an overall view of all the workers that have visits that day (or week/month).
Support Advisors and Clients (for All Over One Day) shows the appointments for one day, with columns for clients and Support Workers and matching appointments in both columns. This calendar has drag-and-drop functionality, which is great for making quick changes to a daily schedule.
Below this, you may see more calendars, which will be specific to the support teams and to the projects that you have on your system. The picture above shows that I have two support teams (Team 2 and Team 3) and one project using the functionality of the Support Worker module (Help At Home).
Job Cards
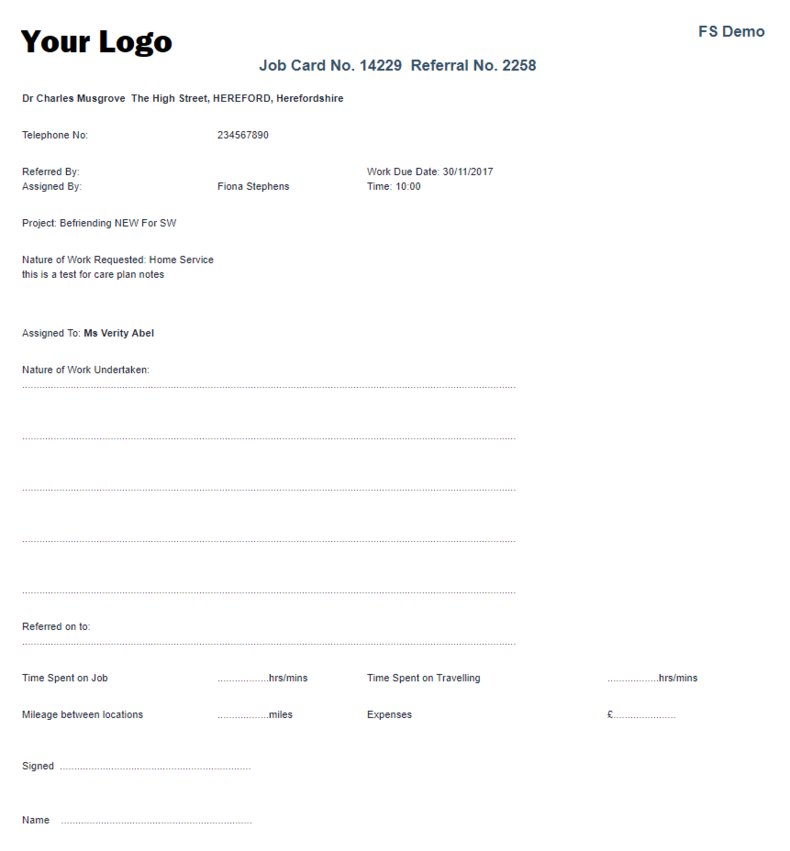
The job cards are probably the most important part of the Support Worker module for day-to-day work. They are where all the setup and scheduling you have done for the appointments is actually translated to your Support Workers.
Printing job cards
The screens which allow you to print job cards are found in the "Support Worker" submenu, as shown:
The first report we will look at is the "Print Job Cards" menu item. Clicking here will take you to the following screen:
From here you can select the options you want to print job cards. You must enter a date range and a project - beyond this you can leave all the options set to "all" or the equivalent, or narrow the results as much as you like. This will print a series of job cards, one job card per page. (It may not look like it, but when printed, this screen will have page breaks in the right places so that there is one job card per page.)
- Tip: if the Support Workers can get access to the internet while out of the office, they can fill in their timesheets directly on your system.
- Tip: if they can't get internet access, and fill in a lot of detail on the job cards, why not scan the job cards and use Uploaded Documents on the Client Details screen to store them?
Of course, one job card per page is not particularly efficient with paper! It's fine when your Support Workers are only carrying out a few visits per week, or when they need to record a lot of detail when they are there, but if you want more of a "summary sheet" view, try one of the following:
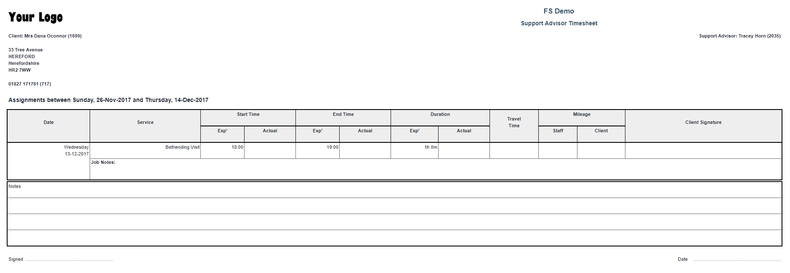
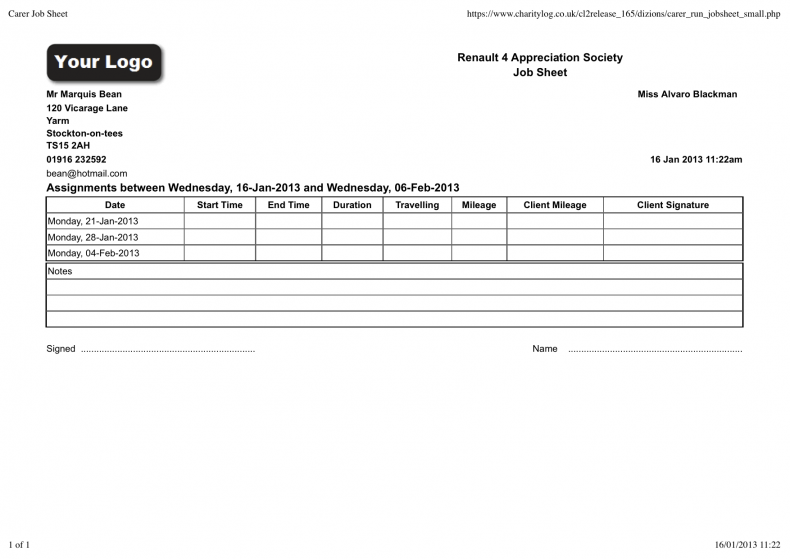
Support Jobsheets, Timesheets and Work Schedules
These are very useful for providing to Support Workers "in the field". Clicking the "Print Support Advisor Time Sheets" menu item will take you to the following screen:
Here you have all the usual options you might expect - date range, project (both of which must be entered) and then the option to narrow your results by a particular job card number range, support team, Support Worker or client. At the top, however, you also have the following drop down list:
The options are as follows:
Support Jobsheets gives you a summarised view, with the expected appointment details along with spaces for the Support Worker to enter the actual values.
Support Jobsheets (Small Version) gives you a similar view, but with the expected appointment details omitted - the Support Worker simply enters the actual values.
Try out the others - they all give roughly the same information but shown in different ways. Which one is appropriate for your organisation will depend on the exact way you run your support work.
Whatever way the information is provided, you need to give the Support Workers the required information about the work they are carrying out. Once the work has been done, and the job card/timesheet filled in, you can carry on to the next section.
How to use the Support Worker module (part 2)
Completing work schedules
So now that the work has been carried out by the Support Workers, we need to let the system know that the work is complete. There are two ways to do this.
One job card at a time
This method is useful if your Support Workers fill in their job cards themselves. It also allows the greatest amount of detail/data to be entered. Click the "Support Job Cards" menu item:
Enter the usual details, and you will be given a display of the matching job cards.
You can now click "Update Details" on the job card you wish to fill in/complete. This will display the following screen - you will also see a summary of the support work the client has received in the past, but this is the bit we are interested in at the moment:
You can now enter the relevant details. Don't forget to mark the job card as "complete", or an appropriate selection from the final drop-down box. If you forget to do this, the job card will still come up in searches of incomplete job cards and it will look like the work hasn't been done.
When you are ready, click "Update" at the bottom. You will be returned to the job card results screen, but the one that you were working with will now be marked as completed. You can still go back and edit the job card if needs be, but because it is marked "complete", it will appear in reports etc.
Several job cards at once
This is the approach to take if you are recording job cards on the system for several Support Workers - the kind of role that a service manager might be doing. In some cases, for example, the manager might not meet face-to-face with the Support Workers that often. Using the Support Worker module, the job cards could be emailed to the Support Workers, and posted back complete or scanned. Though of course, the best way for remote workers like these to operate is to log in to the system themselves and pick up/fill in their time sheets.
Click the "Complete Work Schedules" menu item, and fill in a date range/project/other options as before.
You will be shown the matching job cards, but this time they are displayed with data entry fields/boxes too. Note that you are only shown incomplete job cards.
You can now fill in details of completed work. Note that there is a tick box at the top right of the display which will allow you to mark all the job cards as "complete" in one go. There is also a "Copy & Update" button which will carry over travelling time and mileage figures from the previous appointment on the support plan, if one has already been completed.
Once you have finished filling in the details, click "Update Job Cards".
The job cards are now completed, and you can run reports on what work has been done and when.
Setting up the Support Worker Module
For information on how to set up the Support Worker module, please see the section Support Worker Module (Administrator guide).


