Difference between revisions of "Disabilities"
(→Merging Disabilities) |
(→Merging Disabilities) |
||
| Line 54: | Line 54: | ||
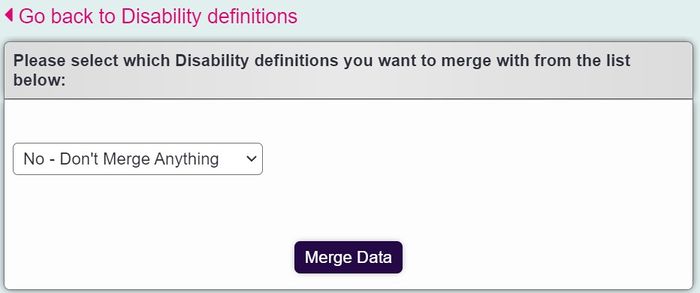
From the drop down select the second item you wish to merge. | From the drop down select the second item you wish to merge. | ||
| − | [[File:Disabilities_merge. | + | [[File:Disabilities_merge.jpg|700px|alt="a list of available disability options to merge with the existing one"]] |
Revision as of 13:10, 6 February 2024
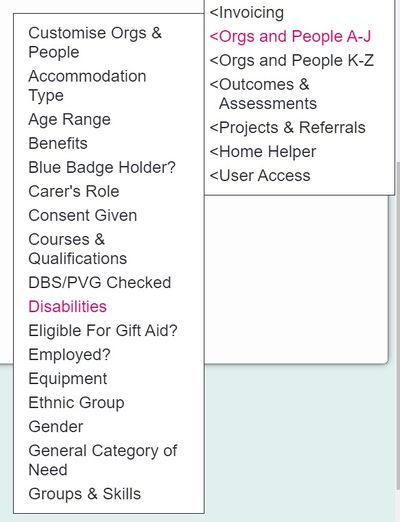
Location in standard build: Administration > Drop-Down Lists > Disabilities
The Disabilities drop-down list is used to populate lists of disabilities that orgs/people on the system may have.
Examples of use
- When users fill in a main disability for a person, for example on the Client Details screen, this list governs the options they have.
- If a person has more than one disability, this can be stored in the Disabilities for... section using the options created in this list.
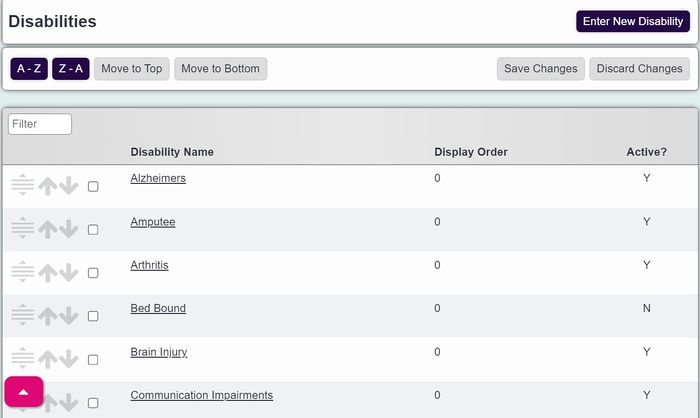
The list of disabilities
The list of disabilities is usually set up as part of pre-implementation, so it's rare that you will need to configure a Disabilities list from scratch. However, as with any other Drop-Down List, they can be edited or changed over time.
Click on the menu item. This will show you the list of Disabilities that are currently set up on the system.
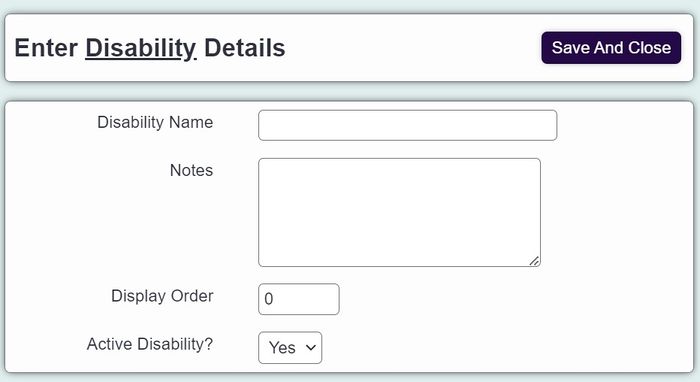
Click on "Enter New Disability" to add a new entry to the list, or click on the name of an existing one to edit it.
You can now enter/edit the following details:
- Disability Name
- Notes (for information on this screen only; these are not displayed on reporting outputs, nor are they carried into any entries)
- Display Order
- Active Disability? - whether this Disability is available for use on the system or not
Click "Save Details" when done.
Merging Disabilities
When viewing an existing Disability, there is a button to "Merge Disabilities" (if you have the correct Group Access permissions) which merges another disability. The records linked to the merged disability will be updated automatically.
Select the first item.
Click on the link to merge.
From the drop down select the second item you wish to merge.
Click the "Merge Data" Button.
After reading the above warning click 'OK' to perform the merge or 'Cancel' to go back. This process cannot be undone.
You can then change the name if required, the data has already been merged, click 'Save Details' to update the name change.


