Difference between revisions of "Setting Up A Work Queue"
(→Personal Tab Section) |
(→Save the new user) |
||
| Line 72: | Line 72: | ||
Click "Save Details" when done. | Click "Save Details" when done. | ||
| − | [[File: | + | [[File:workq_6.jpg|500px]] |
===Check the user account appears correctly=== | ===Check the user account appears correctly=== | ||
Revision as of 12:25, 8 February 2024
The system allows users to send actions to any other user. However, sometimes users want to have somewhere generic they can send work. This might be because;
- When sending actions, the user wants to send them to a team rather than to a specific person
- The user sending the action doesn't know the specific person that should pick it up, so they want to send it to a department (this often happens in large organisations)
- The action could be done by various part-time staff depending on who is in the office first, so the user sending the action wants to have the outstanding action displayed on more than one person's Action List
There is a way that this can be done. There are two steps:
- Set up a user account for the department or team that you want to send work to
- Configure the default Action Lists of the people in that department or team that will be notified, so that these people see the work sent to the department or team as well as their own specific actions
Contents
Example scenario
The YTF Community Project runs a telephone counselling service. There are two members of staff that deliver this service, Alison and David. However, they both work part time. The receptionist at the YTF Community Project takes incoming calls, so when people want to access telephone counselling, the receptionist sends an outstanding action to ask Alison or David to call the client back and arrange a session.
However, the receptionist doesn't know whether it will be Alison or David that need to do this, because they both work part time and the receptionist doesn't always know who will be in the office next. Therefore, the action needs to be sent to both Alison and David, so it can be picked up by whoever sees it first.
Setting up the user account for the team or department
Click on Cog > User Access > Users. This will display a list of all users of the system Click on "Create New User".
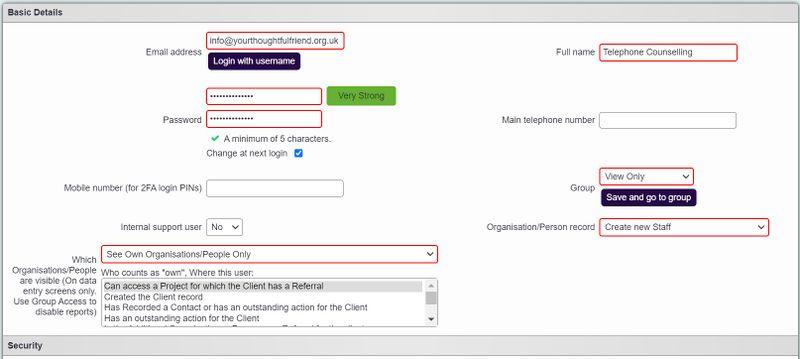
You can now create a user account for the team. Set the user up as follows:
General Details tab
- Full Name: can be anything you like. Using capitals will make the user stand out in the list on Record a Contact screen.
- Email address: required for first level log in. A generic email such as an "info@" address may be appropriate here.
- Password: required for first level log in
Note: nobody will need to log in as this user.
- Group: place the user in a group with few or no permissions. You may like to create an "Inactive Users" group, so that even if anyone did log in as this user, they would not be able to use the system.
- Organisation/Person record?: Create new staff
All other fields can be left blank.
Referrals/Actions Settings Section
Not relevant, as nobody will ever actually log in as the "TELEPHONE COUNSELLING" user.
System Access Section
You may like to un-tick all of the login time boxes, again ensuring that nobody can actually log in as this user.
Project Access Section
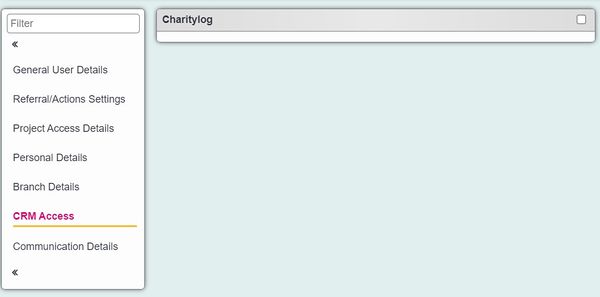
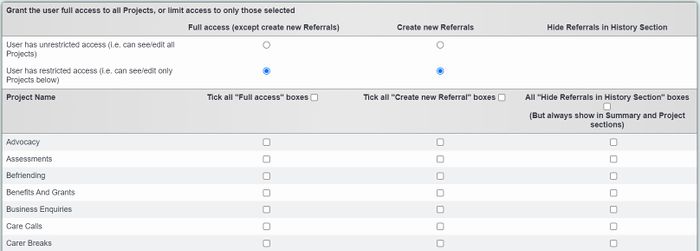
Again, making changes on this section is not essential, but you may like to prevent this user from accessing any projects, should anyone log in as that user.
Personal Details Section
As above; not essential but you may like to restrict access to personal section.
Save the new user
Click "Save Details" when done.
Check the user account appears correctly
Verify that the newly-created user account appears on the Record a Contact screen, in the "Who By?" box.
Configure the team or department members' user accounts
Colin and Kiersten will now need their Action List defaults changing so that they see the actions assigned to "TELEPHONE COUNSELLING" as well as actions assigned directly to them.
Click on Administration > Security > User Settings > Users, then click on the name of the user account to edit.
Click on the "Referrals/Actions Settings" tab, then set the first field - "Own, Selected or All Users" - to "Selected Users Entries Only". Then in the box below that, click on the name of the person.
Without clicking anywhere else, scroll that box to find the user you created for the team/department, then hold the "ctrl" key (on Windows) and click that user too.
The other options in this section can be set as desired, but a good starting configuration is:
- Days to show into past/future: 7
- View Selection: All Contacts Done Plus Outstanding Actions
- List Order: Newest On Top
Check that this works correctly for the user
Unless you have real actions to create for both the department/team and also the individual user, you should do this on a test system.
Assign an action to the individual...
...and one to the department or team.
Finally, get the user (in this case, Colin) to log in and verify that their default Action List view shows both their own actions and also those that have been assigned to the department or team.
We can see here that Colin's action list is working as we want it to.
Now set up the other members of the department or team in the same way.
Notes
Users can change their own Action Lists to display someone else's work - for example, if a colleague calls in sick. If the user does this, they will un-select the work queue actions. However, the work queue actions can be re-selected in the same way as above from their own Action List (in the "Own, Selected or All Users" box).
Even if the user changes it, their Action List view will revert to the default when they next log in.
Rob Kay - manual author (talk) 15:18, 12 March 2015 (GMT)


