Difference between revisions of "Information Links"
(→Accessing the Information Links feature) |
(→Accessing the Information Links feature) |
||
| Line 23: | Line 23: | ||
| − | [[File: | + | [[File:info_links3.PNG|600px]] |
| Line 29: | Line 29: | ||
| − | [[File: | + | [[File:info_links4.PNG|600px]] |
Revision as of 13:18, 17 January 2023
Information Links are a way of categorising the organisations on your system so that you can find an appropriate organisation to signpost someone to, even if you do not know the full list of organisations that are available.
Contents
Accessing the Information Links feature
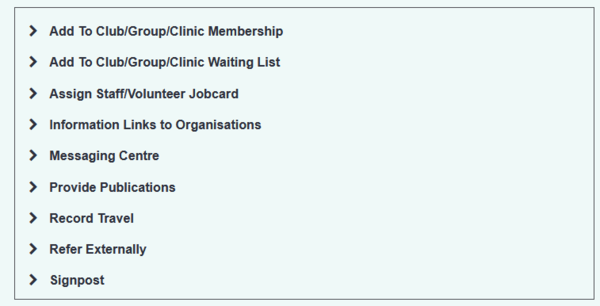
Clicking on the "Information Links" item in the "Options" section of the Record a Contact screen...
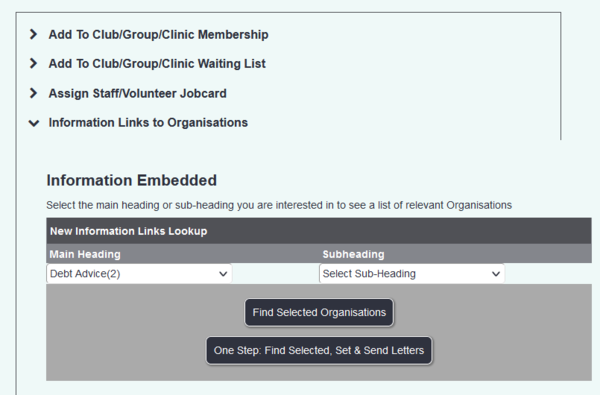
...will bring you to the Information Links lookup screen.
You can now specify a main heading and a subheading to see which organisations might be suitable to signpost to. In the screenshot, a main category of "Building (Internal)" has been specified, and then a subheading of "Plumbers".
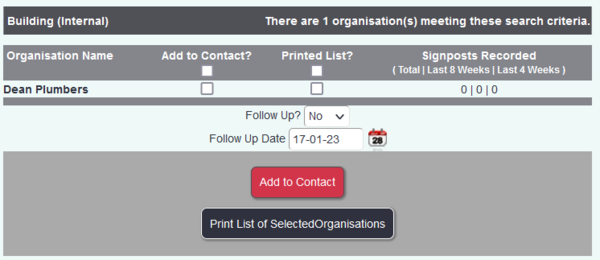
Click on "Find Selected Organisations" to see the results of the heading/subheading that you have specified, along with extra functionality.
You now have options to:
Add the names of the organisation(s) to the Record a Contact text
You would use this if you are giving out the details of the organisation(s) to a client.
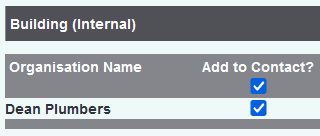
Tick the boxes of the relevant organisations in the "Add to Record a Contact?" column:
Then click the "Add to Contact" button.
This will automatically write text in the "Details of Contact" box.
Print selected names and contact details
This feature, and the "Print All Names" feature, can be used to print a list for the client of the names and contact details of the matching organisations.
Tick the boxes of the relevant organisations in the "Include In Printed List?" column:
Then click the "Print Selected" button.
This will print a list of the contact details for these organisations, as an Information Report, which you can print or email to the client.
Print the names and contact details of all organisations in the category
When the matching organisations are displayed, you can print all of the matching names at once without having to specify the ones that you want.
Instead of selecting certain organisations, just click the "Print All Names" button.
This will print all of the names and contact details of the matching organisations.
Info Link Letters
As well as allowing you to print out a list for the client, the Information Links feature also allows you to print out a pre-formatted letter to the client. This means that you can print an Information Links list but with some preset text added, fields from the client record merged, and so on.
This requires you to set up a standard letter template for the purpose with the information field merged in - which will appear like this in the letter template;
<<information>>
You will then need to set this particular letter template as an Info Link Letter Type.
Once you have taken these two steps, you have the option of using the "Mail Merge Letters" button on the results of an Information Links query. Select the relevant organisations by putting ticks in the boxes in the "Print All Names?" column;
Then click the "Mail Merge Letters" button. You will be prompted to select the letter to use;
This will mail merge a letter to the client, with the information about the relevant organisations embedded. As shown, this can produce a more professional-looking result than a simple printed list.
One Step Find Selected, Set and Send
Once you have set up an Information Links Letter like the one above, you can also use the "One Step Find Selected, Set and Send" button which is on the initial Information Links lookup window.
Select the main heading and, if desired, a subheading. Then click the "One Step Find Selected, Set and Send" button.
This will take you straight to the letter creation page with the relevant information merged into the letter content.


