Office Functionality (Administrator guide)
Contents
Action List
You may like to adjust the configuration of your users' Action Lists to make their work easier. The Action List is perhaps the most useful starting point for any active user, as they will be able to view all their current work from this screen. You can make their default starting page the Action List by accessing their User Account Details screen, then changing the "Start Screen" option (on the General User Details tab) to "Action List".
You also have control of their default view of the Action List. The most common settings are to show their own actions, 7 days past and future, and "All Contacts Done Plus Outstanding Actions". These options can be set using the drop down boxes on the "Referrals/Actions Settings" tab, as shown:
Signposting and External Referrals
The system gives your users the facility to record when they have signposted a client to another organisation, or referred them there to have a piece of work done on their behalf. Details of how this feature is used can be found in the end user guide - Signposting and External Referrals.
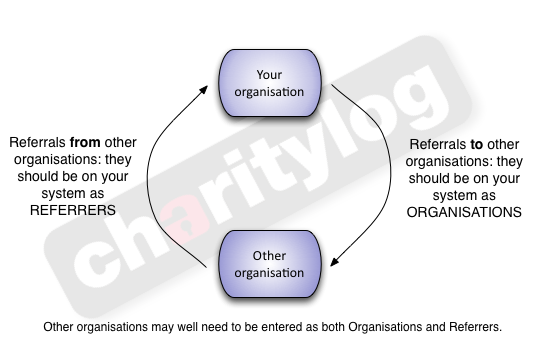
As an administrator, all you need to do to set up this feature is to make sure that your list of Organisations is populated. You should be aware that some external bodies might need to be on your system as Organisations and also Referrers, as this graphic shows:
This means that if you are adding an organisation that refers people in and also is an organisation that you signpost to, they should be entered as both a Referrer and an Organisation. When entering their details, set the "Is this a Referrer?" drop-down box to "Yes", as shown.
Signpost / External Referral Types
The system includes the capability to add some pre-set text to each signpost/external referral that a user makes. For example, you may want to distinguish between
- Signposts to other charities
- Signposts to statutary bodies
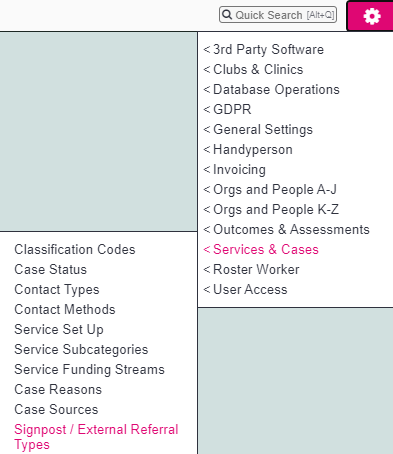
Go to Signpost / External Referral Types under the Services and Cases section under the settings cog.
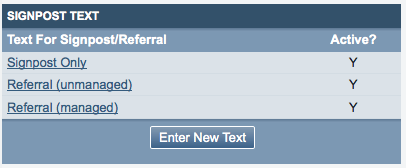
Once you have clicked the link, you will be taken to a screen where the existing categories (if there are any) are displayed. Click "Enter New Text" to add a new category.
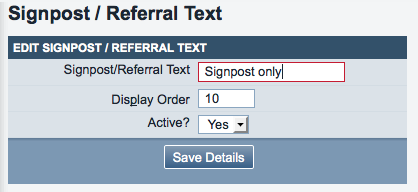
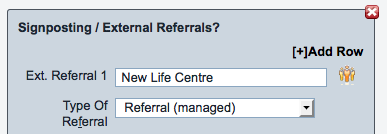
You can now enter some text to be added to each signpost/referral (example shown).
Once you have some different text entries set up, as shown...
...these will now be available when the user records a signpost/external referral from the Record a Contact screen.
Information Links
Click on Administration > Information Links Headings.
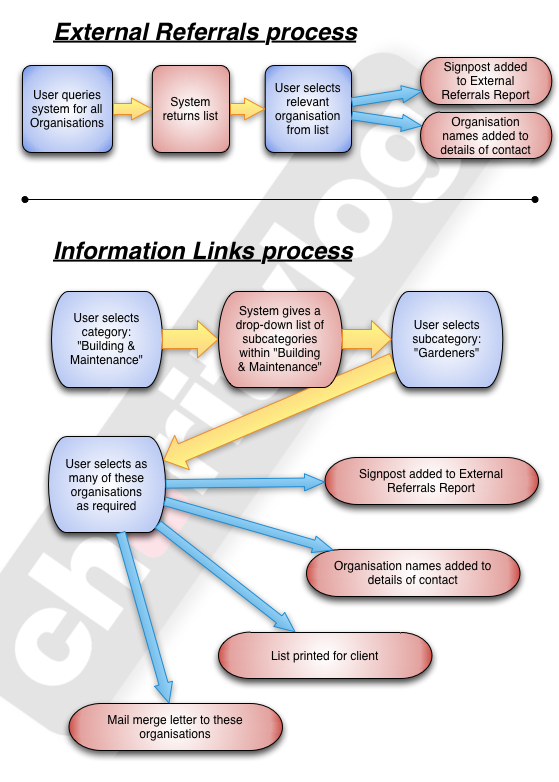
This menu item will let you set up and manage the Information Links heading structure. Users can use Information Links to signpost clients to external organisations from the Record a Contact screen. The External Referrals feature also allows this, but using the "Signposting and External Referrals" link only lets the user pick from a list of organisations. Using Information Links, users can use a category/subcategory system to find the best organisation, even if they do not personally know all of the organisations that you signpost to. This diagram shows the difference between the External Referral process and the Information Links process.
This menu lets you set up and manage your categories and subcategories. First you will need to decide on a category structure - an example structure is shown below (for an organisation signposting to local tradespeople):
- Building (internal)
- Plumbers
- Painters
- Plasterers
- Electrical
- Building (external)
- Roofing
- Groundwork
- Windows
- Gardening
Organisations can be tagged with more than one category, so in the above example, you might well want to put a general building firm into most of these categories.
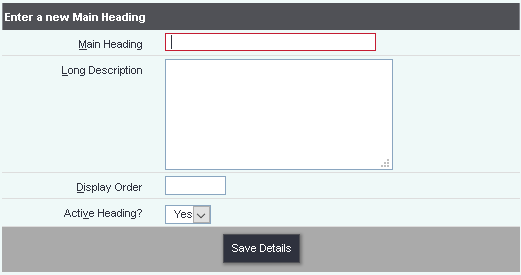
Clicking the menu item will take you to a display of existing headings, if there are any. Click "Create New Heading" to make a new one.
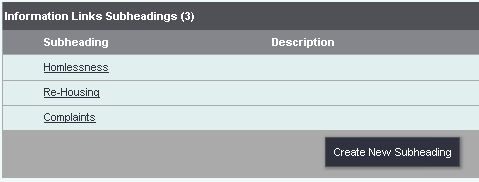
Click "Save Details" to create your heading. Once created, click the "Edit Subheadings" button to create the subheadings.
Categorising Organisations for Information Links
Once your headings and subheadings are created, you can assign them to organisations, so that end users can find the organisations by category. On the "General Details" tab of an Organisation Details screen, there is an option - "Include in Info. Links".
This needs to be set to "Yes". Then click the "Save & set Information Links" button at the bottom of the record.
Once here you can start setting up the Information Links. Add a main heading and a subheading:
Then click "Save Link" when done.
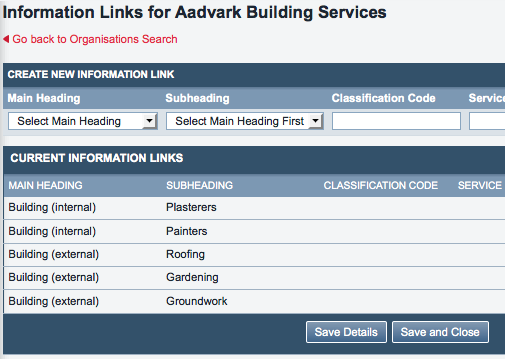
The link will now be displayed in the "Current Information Links" area.
You can add several links to one organisation, if it is appropriate for them to appear under several different headings/subheadings. In the example screenshot, Aardvark Building Services do plastering, painting, roofing, gardening and groundwork.
The Information Links feature can be incredibly useful, particularly for organisations that do a lot of signposting, such as advocacy groups. However, for Information Links to work properly, all the Organisations on your system need to be properly categorised, following the process above. If you have end users who do a lot of the signposting work, and/or have good knowledge of the other organisations that you regularly refer to, it might be worth asking them if they could take on some of the work of categorising the Organisations. It's a good idea to check all the Organisations monthly, to make sure that the Information Links are correctly set for each one.
If you want end users to help you out in this way, you may find that you need to give them some extra user permissions, or move them up to a User Group with more privileges.
Uploaded Documents
Users can place uploaded documents in categories, and can re-order the list of uploaded documents (linked to the Client Details screen) by category, to help find the document they are looking for. These categories are set up from the "General Settings" menu item in the settings cog.
Clicking the link will allow you to add, edit and change categories.
Standard Letter Templates
Standard Letter Templates are the basis of letters that users can automatically create. These letters can either be created on a one-off basis, for example from a client's Details screen, or via a mail merge to a group of people. "Standard Letters" can also be emails, or you can set up letters that can create a letter or an email depending on how you want to use them.
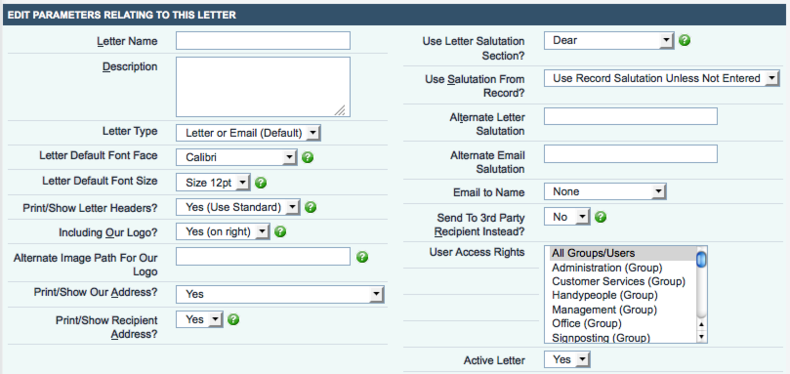
Clicking on the menu link will take you to a list of letters set up on your system, if there are any. Click on "Enter New Letter" to create a new one. The options you have available are as follows:
- Name
- Description
- Letter Type: Choose from letter or email (the default), letter only, or email only.
- Letter Default Font Face
- Letter Default Font Size
- Print/Show Letter Headers?
- "Yes (Use Standard)" will use the standard page header. The page header is the section at the top of the page. On the first page it also has the organisation (from) address and the organisation's logo.
- "Yes (Use Alternate)" will let you manually write in a header, specific to this particular letter.
- "No" will not show a header.
- Including Our Logo? - choose from "Yes (on right)", "Yes (on left)" or "No".
- Alternate Image Path For Our Logo - this is a web URL which can be used to show a different logo to the one set up on your system. You can also (if you're careful) use this box to bring in a high-resolution image of a page header, if you have a complicated header that the standard text creation tool will not allow you to create.
- Print/Show Our Address? - choose from "Yes", "No", or "Use "Alternate Address" Box". Picking the last option will make an extra text entry box appear above the main body of the letter, where you can enter a different address from your standard one, if required.
- Print/Show Recipient Address? - Choose whether to show the recipient's (to) address on the top left of the letter. If used, this will be located in the envelope window position.
- Use Letter Salutation Section? - This will show or hide the letter salutation section. It also relates to the following 4 options...
- Use Salutation From Record? - Organisations and People stored on the system have a salutation on their Details screen - in the case of clients, the system creates it automatically from the client's surname and title (so, title = Mrs and surname = Jones would mean the system will create the salutation "Mrs Jones"). You can choose to use this salutation, use no salutation, or use an alternate one which you can enter below.
- Alternate Letter Salutation
- Alternate Email Salutation
- Email to Name - choose from None, Salutation, First Name, or Full Title And Name.
- Send To 3rd Party Recipient Instead? - If this is set to 'Yes' the system will prompt at the letter creation for you to use the client's address or select a 3rd party address for the letter.
- User Access Rights - control who can use this letter; choose by user group, certain users, or both.
- Active Letter - set to "Yes" for current letters, set to "No" for ones which are obsolete.
Depending on the options selected, you may now proceed to entering the main letter text, or you may need to enter an alternate header and/or address.
The editor for the letter body text has all the usual formatting options. Note that there is a "Paste From Word" button to use if you are having trouble with text pasted from Microsoft Word displaying incorrectly. Word text contains a lot of formatting information which is not usually shown, and this button strips out this formatting.
There is also an important button at the extreme right-hand end of the toolbar:
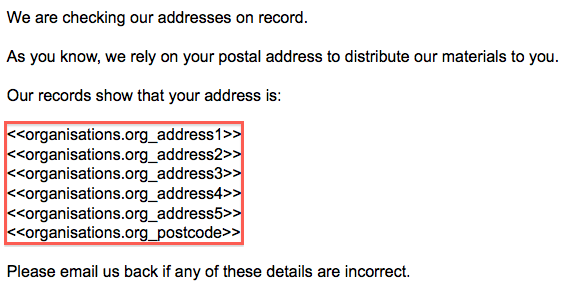
This is the Insert Merge Fields button, and it allows you to merge in fields from the data stored about a particular person. Clicking the button will open a window where you can pick the fields to be merged in. For example if you picked all the address data, as shown:
You could then merge these into the letter, as shown:
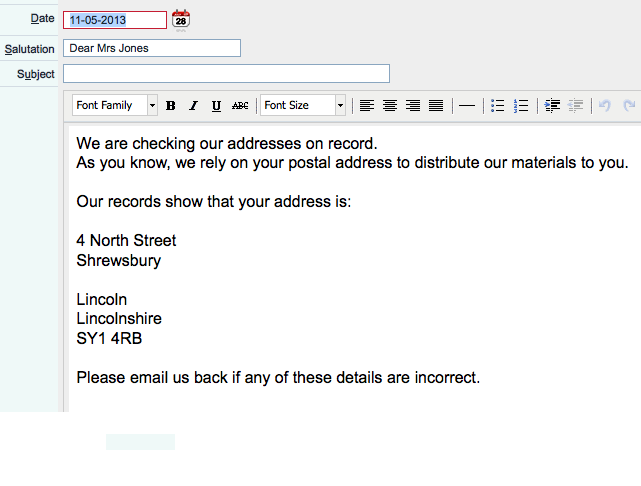
And the resulting letter would read as follows (showing an automatically created email to Mrs Ann Jones - note the system created salutation):
When to use Standard Letters
Standard Letters are often overlooked feature of the system, but they can be very useful to an organisation. They are particularly useful for quick, "one-shot" letters, for example -
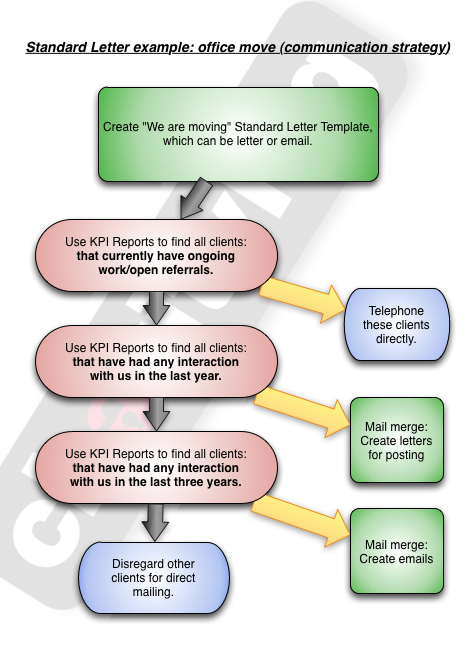
- If your organisation is moving offices, or going to be closed for works etc, you could use a Standard Letter to let your clients know. The useful thing about using the system's Standard Letters functionality for this is that because of the system's excellent reporting features, you can use a very specific report to find the people you want to contact. In this scenario, you might do the following -
This shows how Standard Letters can be a powerful addition to a strategy like this.
- You can use the system to identify every client with a currently open referral, and telephone these clients directly to make sure they know about your office move.
- You can then identify the recent clients, and send them a letter (which is relatively expensive, but at least it has been targeted to the people that are currently active).
- Then you can identify historical clients, and send them an email with the same text as the letter.
- Finally you might choose to disregard the older historical clients, assuming that if they have had no interaction with you for three years, they have either moved away or no longer require your services.
When not to use Standard Letters
The Standard Letter creator is designed to be easy to use, and so it does not have complicated image formatting tools or graphic design capability. If you want to make some sort of mailing which uses these functions - for example, a yearly newsletter - you may find that Standard Letters is not the best way to do this. We would advise that you use the reports to identify the people you want to contact, as in the diagram above, but then export the results to an Excel spreadsheet. From this spreadsheet you can mail-merge using Microsoft Office, Outlook (for email) or any other office productivity package you wish.
Standard Letter Types
As well as communicating with organisations and people, Standard Letters have another use, which is to be used as part of the Information Links process. A letter can be sent to the organisation in question about the client, for example, to ask that organisation to get in touch with the client. For this to work effectively, the "Send to 3rd Party Recipient?" option on the letter should be set to "Yes", and the letter should be set to bring in the client's details (whatever is relevant) using the Insert Merge Fields button.
There are also letter types available here for the Funded Work module.
Publication setup
If your organisation gives out standard publications, like fact sheets/bus timetables/etc, you can use the options in the "Publication Setup" submenu to categorise these publications, and your users can then log each time they give one out. In this way, you can track how many have been provided and to whom.
- Publication Categories can be used to categorise your publications - for example, "Fact Sheets", "Bus Timetables", "Library Leaflets" and so on.
- Publication Languages is an extra level of categorisation if you have the same publications available in several languages, but it is not available for reporting and so can be ignored.
- Publications is a list of the publications themselves.
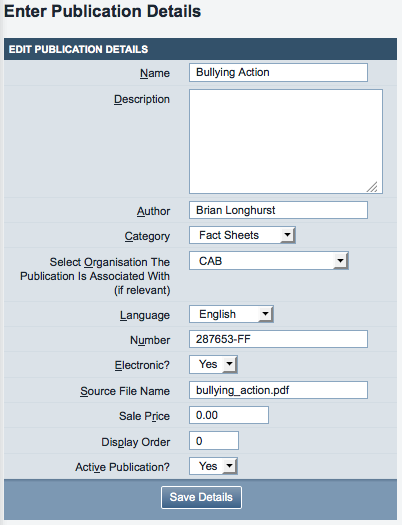
Each publication has some options attached, as shown -
- Name and description
- Author
- Category (users will be able to use these categories to find the right publications)
- Language
- Number (might be a standard reference number)
- Electronic? (yes or no)
- Source File Name (to help users find the relevant file, if they need to print a copy for a client)
- Sale price
- Display order (in the list of publications)
- Active?


