Project Set Up
Contents
Introduction
Projects allow Referrals and Contacts to be grouped together, they represent the services your organisation provides. For example, if you offer an Information and Advice service (including advocacy support) you may consider two projects; Information & Advice and Advocacy. You could then report on projects together or separately.
Projects are also used with some of the Modules available:
- Handypersons - Doing minor home adaptations
- Roster - Care Provision, Befriending and other roster type service
Some services may offer sub services. For example, a Befriending service that offers Telephone Befriending and Home Visiting. If there is a requirement to report on the subservices you may decide to use a project for each sub service.
Projects are not just used for working with service users and can be useful in other areas of the organisation. You could have a project for:
- Volunteer Recruitment
- Training
- Administration
For a webinar on this, see here.
Apart from reporting, projects will enable you to use templates and workflows, with reminders for the users. When you open a new case or referral this would then be connected to a project. Any work undertaken will be recorded and reported under the associated project. You can also restrict users to which projects are available. Through this page you will see the available options to projects.
Project Setup
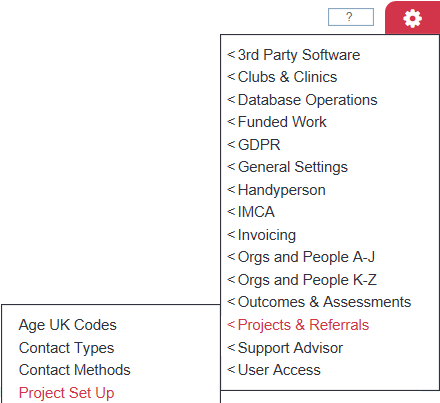
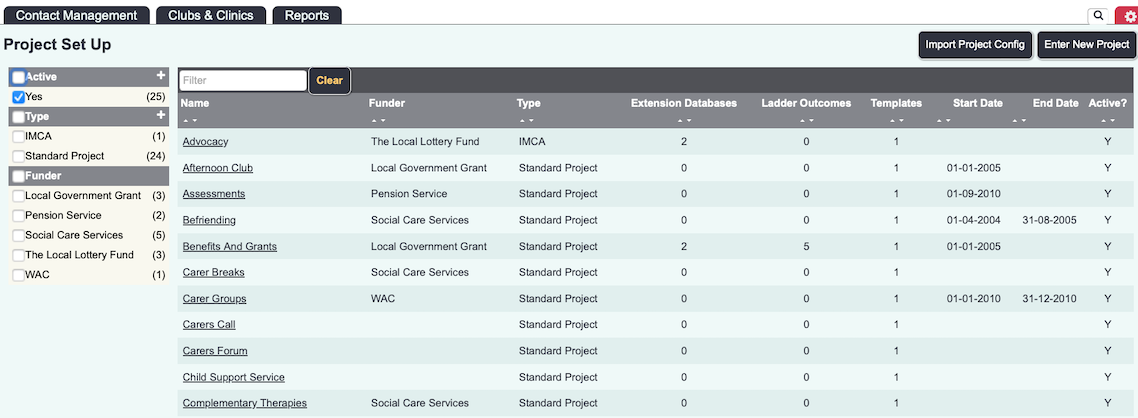
When you navigate to the Project Setup page you will be displayed the current active projects on the system with some summary information:
- Name of the project
- The funder of the project
- Type of project - Will be blank for standard projects. If connected to a Module the module name will be displayed; Funded Work, Handyperson Scheme, IMCA Project or Roster Workers Schedules.
- The number of referral/case based extension databases connected to the project.
- The number of Ladder Outcomes connected to the project.
- The start date of the project.
- The end date of the project.
- If the project is still active - If set to know the project will not be available to reports or Recording Contacts, project history will still be displayed on person/org records history page.
On the left hand side you can see options which will filter the results. You can filter by:
- Active - clicking on this will reveal inactive projects
- Type
- Funder (if used)
Export Config.
This allows you to set up a project in another system such as a Replica Database and then copy it to your live system. This means you can test a project's configuration and functions to ensure you are happy with it, then import it directly into your live system.
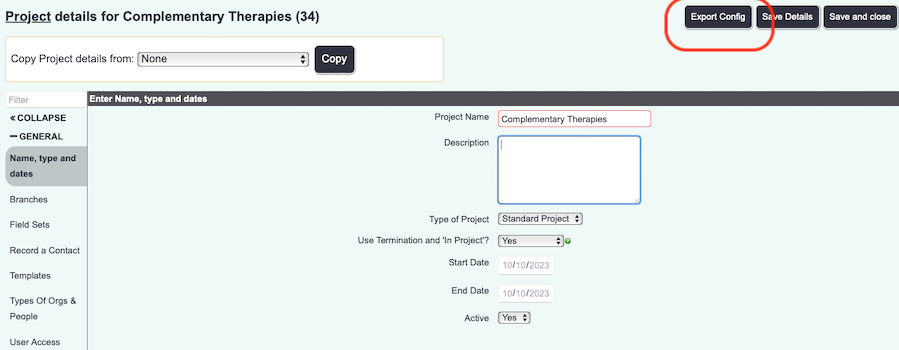
To download, click on Export Config, then click Download. This will create an Excel sheet which you can then save. There is no need to edit the Excel sheet. Ensure you do not edit the excel sheet in anyway.
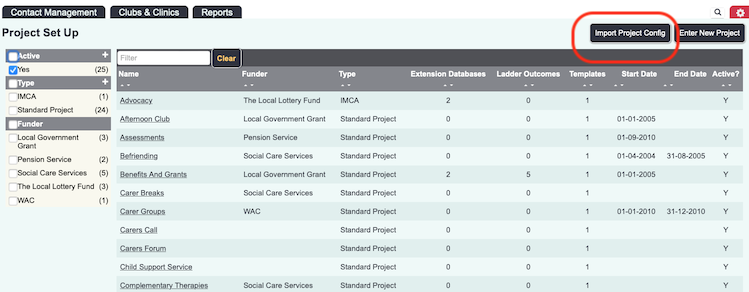
You can then log into the system you wish to import the project, go to Project Set up and click on Import Project Config.
Clicking on Import using File will allow you to choose the Excel file you previously downloaded.
You can then click Upload and it will import the project.
Creating/Editing Projects
To edit a project click on it's name or to add a new project click the 'Enter New Project' button. You will then be taken to the individual/new project page. If you want to copy the settings of another project select it in the drop down and click copy, on the prompt click cancel or okay.
You will need to enter/edit the details on each section.
All settings are explained below. but this webinar provides an overview of how to set up a typical project.
General options
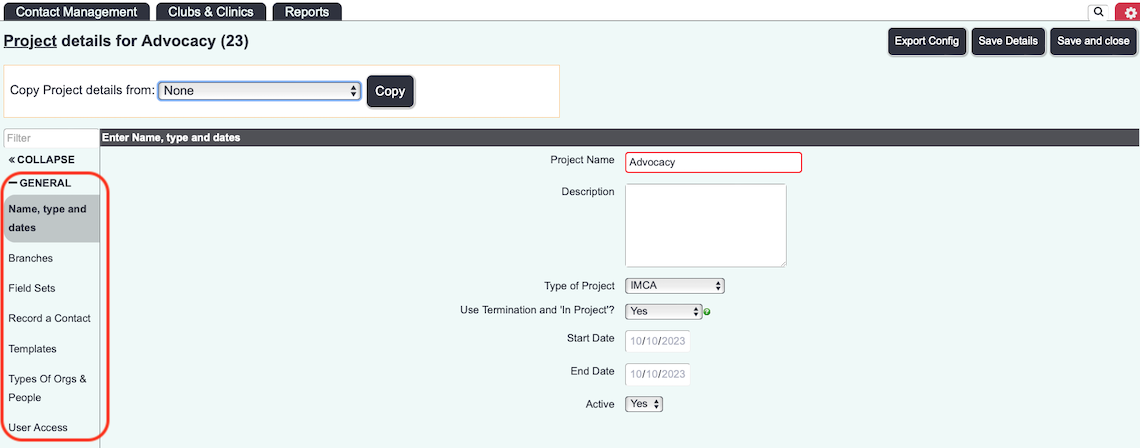
General details section groups together the main functions of a project as highlighted in the below screenshot.
Name, Type and Dates
- Project Name - The name of the service/project, this will be displayed to users.
- Description - Only displays on this page for administrators.
- Type of Project - Some Modules require a project to be set; Handypersons, IMCA, Funded Work and Roster. Both Handyperson and Roster also have additional option described below.
- Use Termination and "in project"? - This will enable/disable the option to terminate people from projects if you solely want to use referral closure.
- Roster Worker Only
- Create Roster Workers Work Schedule Automatically? - Depending on how the service runs you can have a support plan created when a referral is received. If you are going to record cases/referrals that would be enquires or maybe an assessment needs to be carried out first you can select 'No'. The support plan can be created when the person/organisation has been accepted to receive the service.
- Send email to co-ordinator email address (if 'Additional Notes' box is filled in on Jobcard entry screen) - When a worker has updated their work there is an option to record job notes that can be sent to the coordinator. It is strongly recommended that you use your own email servers (see Email Settings) and only use a secure email system (Encrypted email to the client application).
- Co-ordinator email address - Enter the email address where the above notes would be sent to.
- Handy Persons Only
- Create Handyperson Job Automatically? - Depending on how the service runs you can have a JP Job Card created when a referral is received. If you are going to record cases/referrals that would be enquires or maybe an assessment needs to be carried out first you can select 'No'. The HP Job Card can be created when the person/organisation has been accepted to receive the service.
- Roster Worker Only
- Start Date - This is a non reportable field and is for information purposes only, specifies the start date of the service.
- End Date - This is a non reportable field and is for information purposes only, specifies the end date of the service.
- Active? - When set to yes the project is available to be used and reported on. When set to no the project cannot be used to accept new referrals/cases or to be reported on. Any history on a person/org record will be visible for inactive projects.
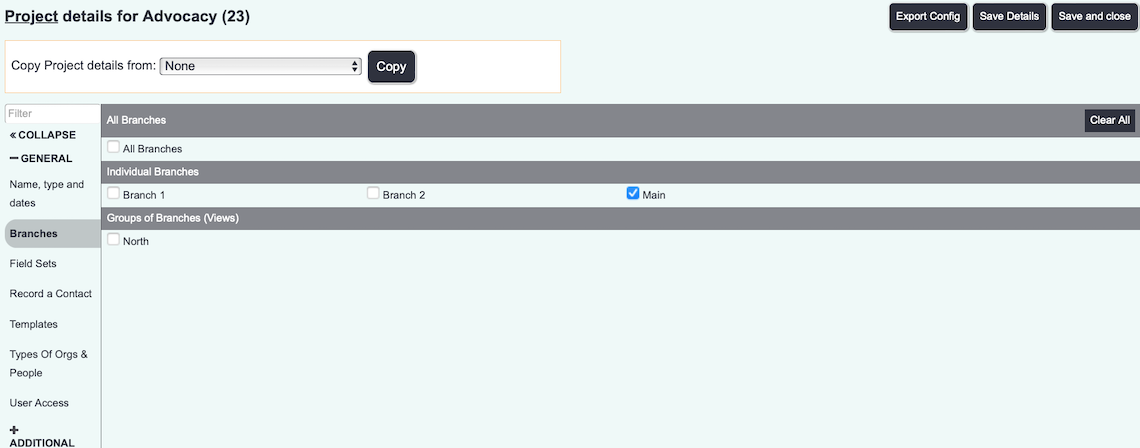
Branches (Requires Branch Module)
With the Branch Module you will have a 'Branches' section. On this section you are able to select which branches this project is available to. You can also select branch views (groups of branches).
If a project is set across branches and a user has access to this project and the branches you can set the user record to view referrals/cases from these branches (see Users).
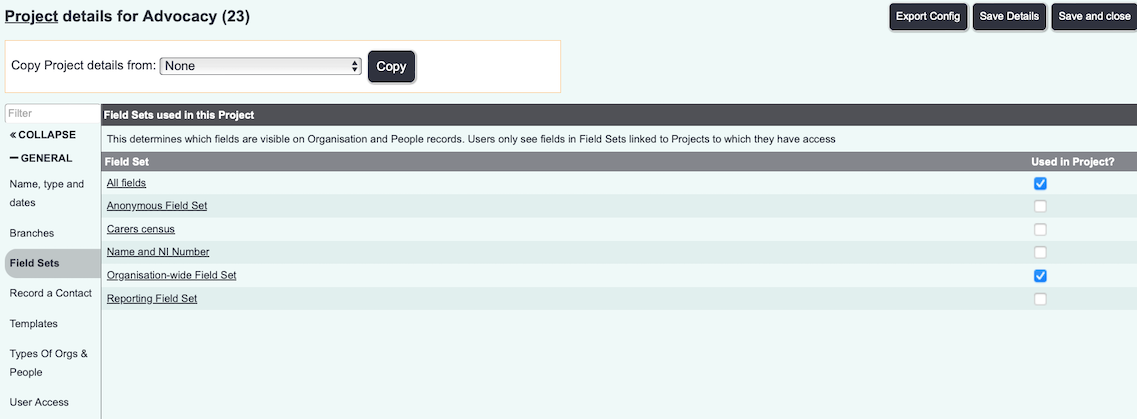
Field Sets
This section specifies which GDPR field set(s) are required for this project to function. If you need Names, addresses etc for the service user then this requires a field set(s) to specify these fields (See Field Sets). When a user logs in the system will look at the projects the user has access to and display the fields required by these projects.
Simply select all the field sets that are required by this project. Visit Field Sets to edit or create a new one.
Record a Contact
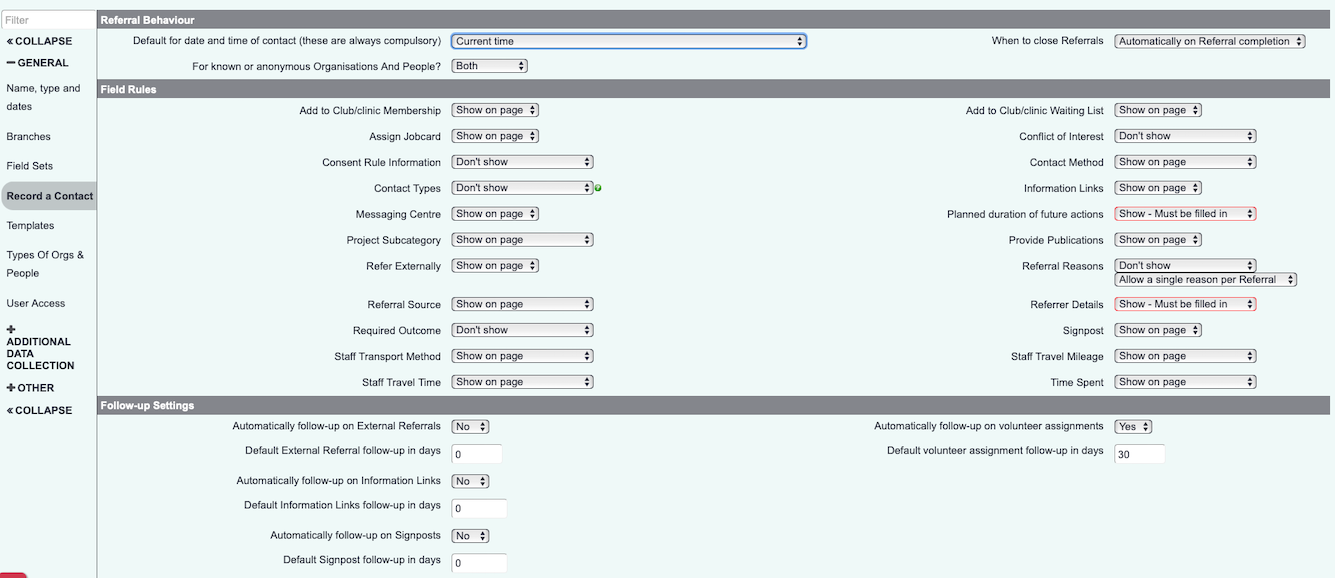
This section controls the functionality of the Record A Contact screen, see Contact Management. You can decide which fields appear on the Record a Contact screen. This means you can tailor that screen to the requirements of the project. If it's just used to record information about a process, you may not need things like Referrer, a Contact Method etc. Options for fields are:
- Dont Show
- Show on page - can be un-selected
- Show - warn if not filled in - will prompt users with a reminder to fill in, but will allow to be left un-selected
- Show - must be filled in - will not allow a user to proceed unless an option is selected.
Referral Behaviour:
- Default for date and time of contact - Choose if the date and time box is blank, uses the time at the point the contact was created or the time that a previous action (if used) was due to be done.
- When to close referrals - When set to yes a referral will be closed automatically if there are no further/outstanding actions to be completed. Generally if something is to be done before a referral/case is closed a further action would be set (do case review, check client is okay etc). If set to 'no' then the referral needs to be closed manually on the referral/case outcome screen.
- For known or anonymous Organisations And People? - this allows you to record contact, or receive referrals from either anonymous people, known people or both.
Field Rules:
- Add to Club/clinic Membership - allows you to add as a member directly from the record a contact screen. Clubs/clinics listed will be the ones belonging to that project.
- Assign Job Card - if this project uses job cards, you can add them directly from the record a contact screen.
- Consent Rule Information? - Allows the entry of referral based Consent Rules to be displayed/forced.
- Contact Types - In addition to Contact Methods you can use Contact Types to increase report statistics.
- Message Centre - emails/sms can be sent when Further Actions are created
- Priority ratings - this creates a priority rating drop down for further actions. Please note, the list of priority ratings is currently not customisable. This also needs to be enabled in Operational Rules
- Project Subcategory - Decide the entry requirement for the project subcategory option. This appears on the record a contact page for the project, and you can define if this field is mandatory, presents a warning, or can be left empty.
- Refer Externally - allows you to capture details where a referral to an external organisation has been made.
- Referral source? - This field appears as 'where did they hear about us?' on the record a contact screen. You can decided if this is displayed, not displayed, or forced. Populate the items in this list via Cog > Projects & Referrals > Referral Sources.
- Required Outcome? - Required Outcome is an additional text box that can be added when creating a new referral/case.
- Staff Transport Method - This field allows you to record the method of transport used by the staff member travelling for the contact. This field is displayed on the right hand side of the screen, and you can decide if you'd like this to be forced, displayed, or not displayed.
- Staff Travel Time - This will allow you to record the amount of time spent travelling for the contact. This field is displayed on the right hand side of the screen, and you can decide if you'd like this to be forced, displayed, or not displayed.
- Add to Club/clinic Waiting List - can add directly to a group waiting list, as opposed to adding as a member.
- Conflict of Interest? - Allow entry/force the option to specify if there is a conflict of interest with notes. If this is forced it will be required to input on each contact.*Allow Entry of Conflict of Interest? - Allow entry/force the option to specify if there is a conflict of interest with notes. If this is forced it will be required to input on each contact.
- Contact Method - will display how the contact took place eg telephone, email or face to face. For some monitoring reports, this is essential information.
- Information Links - If Information Links are used, you can find relevant information as you record a contact.
- Planned duration of future actions? - This option allows you to specify the time of future contacts/appointment.
- Provide Publications - allows you to capture if any Publications have been issued as part of this contact.
- Referral Reasons? - This allows you to specify if a single or multiple reason can/must be selected. Generally this is 'Why have they come to our service?'
- Referrer details - This allows you to specify if a warning is display if a referrer is not selected or forces a referral to be selected.
- Signpost - allows you to capture details where you have signposted to an external organisation
- Staff Travel Mileage - This will allow you to record the amount of mileage used when travelling for the contact. This field is displayed on the right hand side of the screen, and you can decide if you'd like this to be forced, displayed, or not displayed.
- Time Spent - Time spent can be used to record the amount of time the user spent on that contact. This will appear on the core part of the record a contact screen.
Follow up settings:
- Automatically Follow-up on External Referrals - This will create an outstanding action for this option.
- If set, default external referral follow-up in days - This specifies the follow-date.
- Automatically Follow-up on Information Links - This will create an outstanding action for this option.
- If set, Default Information Referral Follow-up in Days - This specifies the follow-date.
- Automatically Follow-up on Signposts? - This will create an outstanding action for this option.
- If set, default Signpost follow-up in days - This specifies the follow-date.
- Automatically follow-up on volunteer assignments - This will create an outstanding action for this option.
- If set, default volunteer follow-up in days - This specifies the follow-date.
Referral Templates
Referral templates are used to define the different stages a referral may progress through. They can automate certain aspects of the referral process. They also aid reporting because it will demonstrate the particular stage a referral is on which is useful for case management.
Types Of Orgs & People
The Types of Orgs and People section controls which record types are used with this project. You can also link a second record to attach to the referral/case, as well as showing this referral on the linked record (this can be set via Operational Rules)
The top section of this page allows you to specify which of the record types this project/service is available to (provided to). When you select Record A Contact for the chosen record type this will display this Project.
The bottom section allows you to add an additional person/org to the referral/case, this can be used for different scenarios. You can also restrict the system so the the additional person can only be selected once whilst a referral/case is still open/ongoing.
Examples of use for additional person/org
- Complaints - Someone is making a complaint against an organisation on your system. You can have the history displayed on both the Client (person making the complaint) and the organisation (whom the complaint is against):
- The top section set to Clients.
- Bottom Section set to Organisations.
- The alternative name set to 'Complaint against'.
- Referring Person - This can allow you to record not only the referrer but the referring person. You probably would not have the history display on the referring persons record:
- The top section set to Clients.
- Bottom Section set to Professionals.
- The alternative name set to 'Referring Person'.
- Assigning a support worker - The referral can be received and have multiple people working on the case, but you need to name one dedicated person as the support worker:
- The top section set to Clients.
- Bottom Section set to Staff.
- The alternative name set to 'Support Worker'.
- Disciplinary Meeting for Staff - You may want to use the system for some HR functions like appraisals or a disciplinary.
- The top section set to Staff.
- Bottom Section set to Staff.
- The alternative name set to 'Staff witness'.
- Working with a young person with a parent - Your clients would be named as Child and you would require a record type named to Parents. The parent record could be set to show the history of all children they have.
- The top section set to Child.
- Bottom Section set to Parent.
- The alternative name set to 'Parent or Carer'.
User Access
This section enables bulk editing of restricted users to give access to the project and/or to create referrals in the project.
You can give access to all users by selecting Tick All at the top of each column. If you wish to only select individual users simply click the appropriate tick box for each user you wish to change.
- Full Access - This will allow the user to view the details of referrals on the Action List and on the records History section.
- New Referrals - This allows the user to select the project on the project selector for Record A Contact.
Additional Data Collection Options
Ancillary functions relating to additional data options are grouped together here.
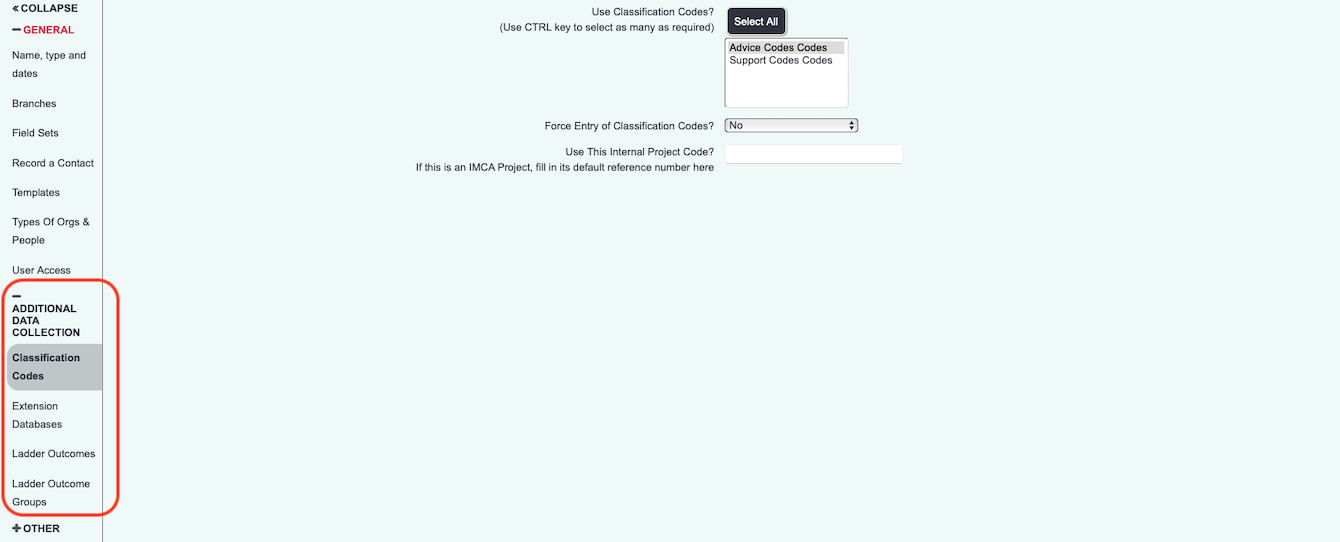
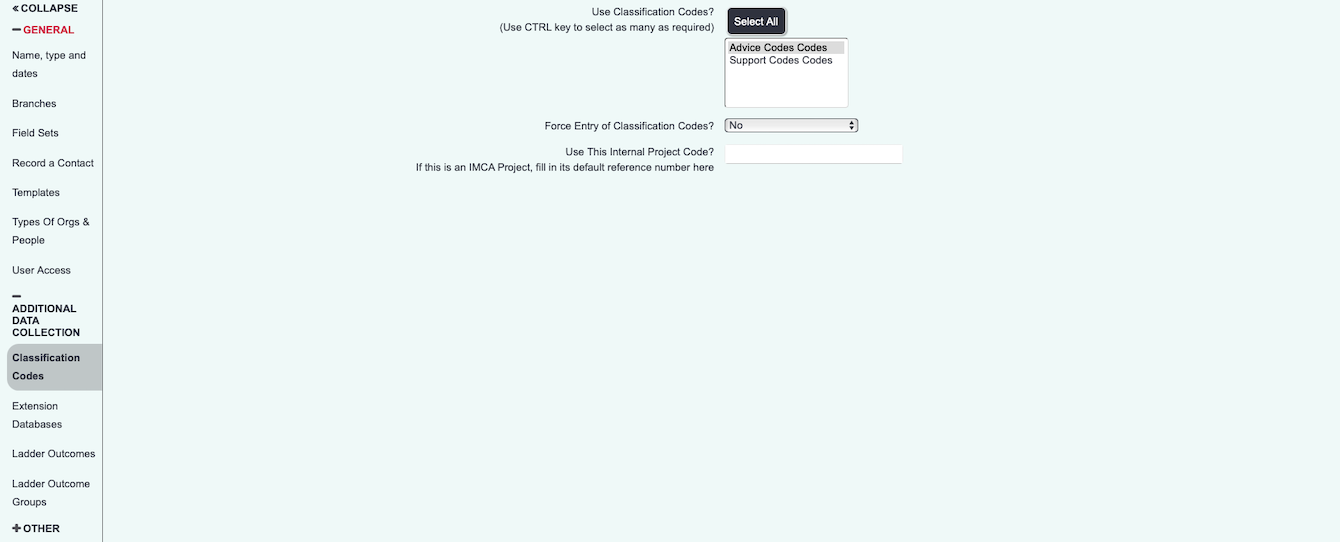
Code Settings
The Code Settings section is used to set which Classification Codes are used by the project and these are either Referral/Case based (displayed on the Record A Contact page) or Outcome Based (displayed on the Referral/Case Outcome page).If you wish to select multiple sets of codes you can click on the first set and click the remaining codes whilst holding down the CTRL button on the keyboard. Once you have select codes you can then choose if the codes are forced.
Extension Databases
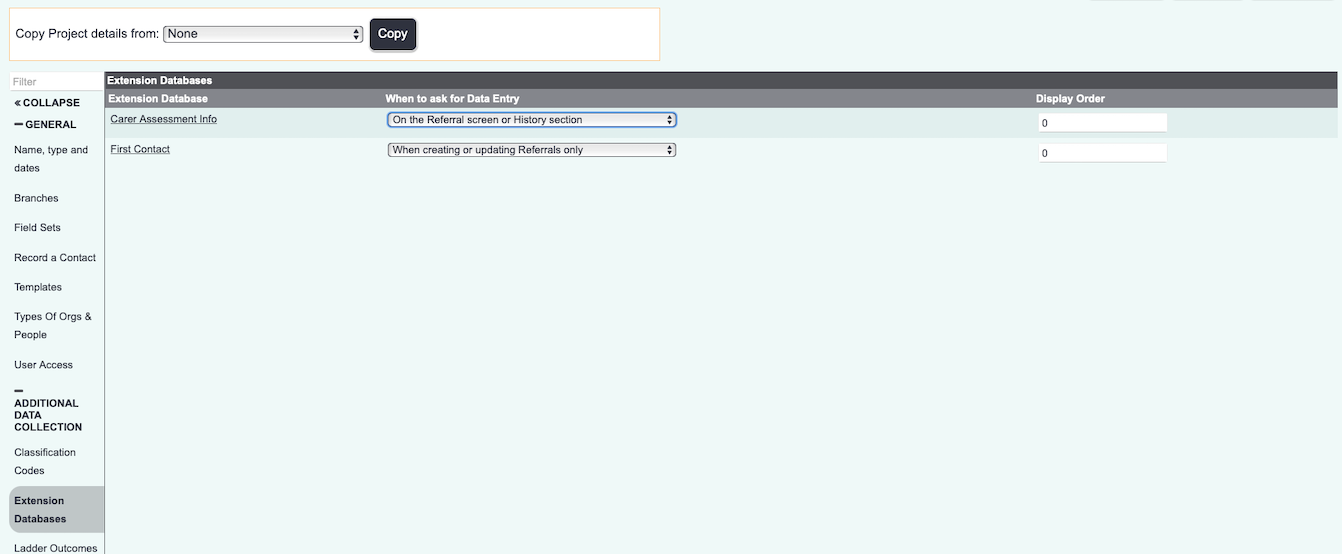
You will be displayed a list of extension databases that have been set up to be used with this project (see Extension Database Setup).
When to ask for Data Entry
- On the Referral screen or History Section - This will only show on the person/org history page (shows the top three set in the display order) and on the referral edit page (shows all). It will not be displayed when recording any contacts for the project.
- When creating new Referrals only - Will be displayed when creating a new referral/case and not on future contacts/updates. It will also be display on the history section (shows the top three set in the display order) and on the referral edit page (shows all).
- When creating new or re-saving old Referrals only - This is useful if you have setup a new extension database. If a user either creates a new referral or edits an exiting referral the Extension Database will be displayed. It will also be display on the history section (shows the top three set in the display order) and on the referral edit page (shows all).
- When creating Referrals or Actions (For every occurrence) - This will display the extension database when creating a referral, updating an outstanding action, creating a further action or extra info. It will also be display on the history section (shows the top three set in the display order) and on the referral edit page (shows all).
The display order shows which order the extension databases will appear (for data entry) and how they are displayed on the history page (shows 3 with the lowest display order) and referral edit page.
Ladder Outcomes (not in groups)
If you have individual ladders that you wish to use then these can be applied here (in addition to the groups). You will be displayed all ladders setup on the system.
- Used in Project? - Set to yes and the group will be available via the Summary page of the client/org for each referral/case.
- No of Subheadings - Displays how many subheading have been configured for the ladder (if 0 the ladder cannot be used as it is not fully set up).
- One or many assessments allowed? - Are you recording a one off assessment (often used with a scale) or Multiple (used to measure progress made from start to end).
- Target outcome needed? - Allows you to record a target, useful for multiple outcomes.
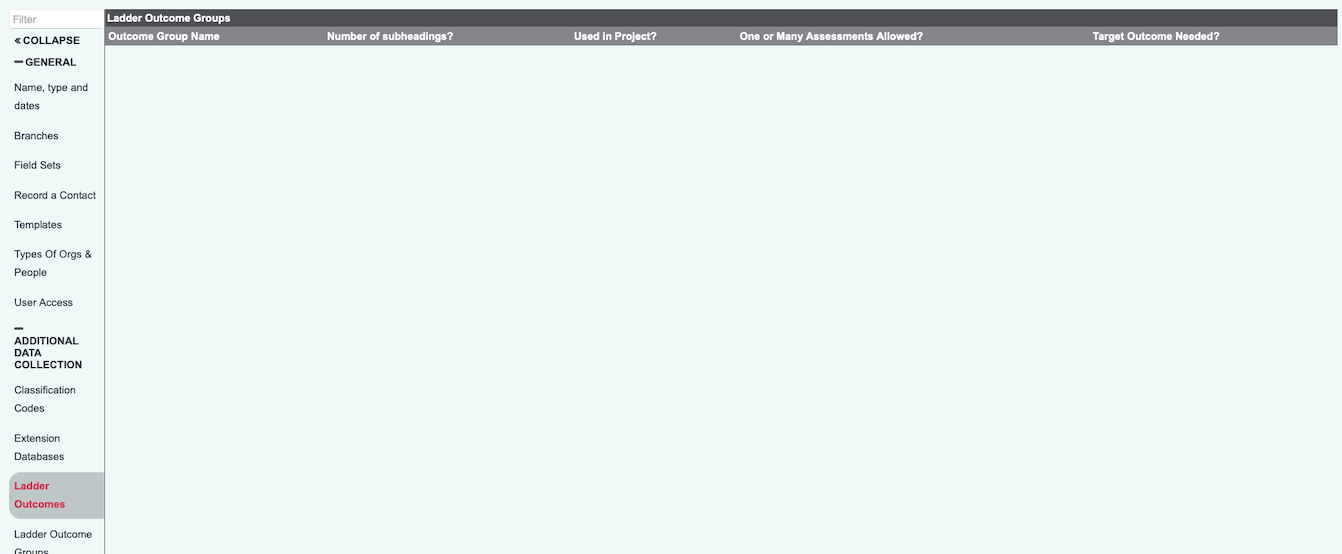
Ladder Outcome Groups
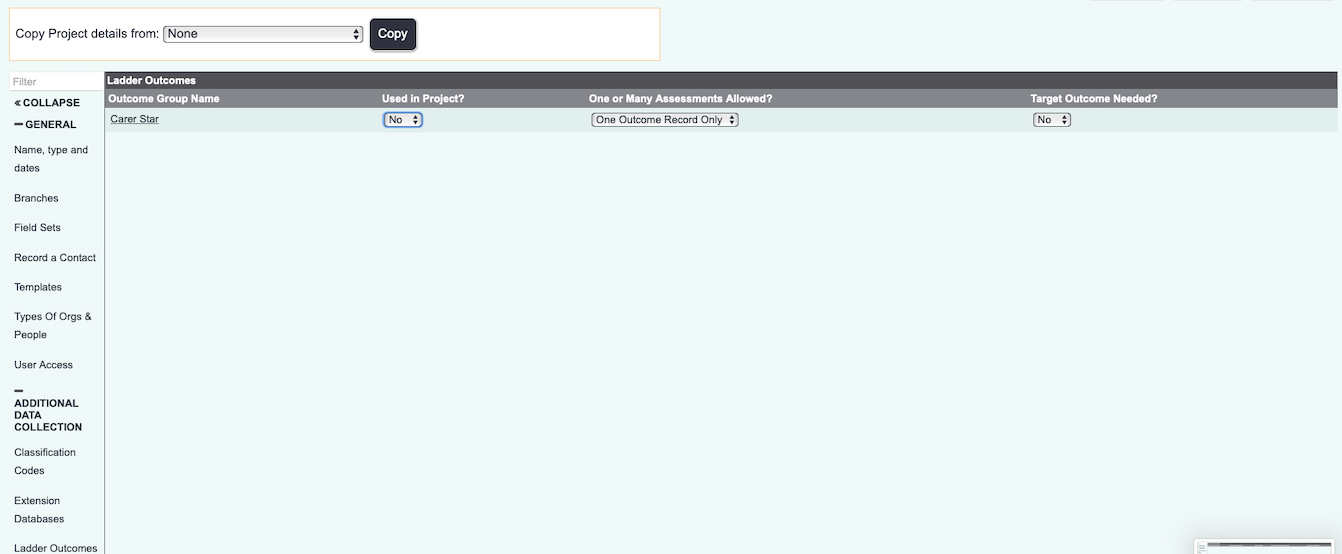
This allows you to specify which Ladder Outcome Groups are used with the project and how they are used. You will be displayed a list of all the groups with the following options;
- Used in Project? - Set to yes and the group will be available via the Summary page of the client/org for each referral/case.
- One or many assessments allowed? - Are you recording a one off assessment (often used with a scale) or Multiple (used to measure progress made from start to end).
- Target outcome needed? - Allows you to record a target, useful for multiple outcomes.
Other
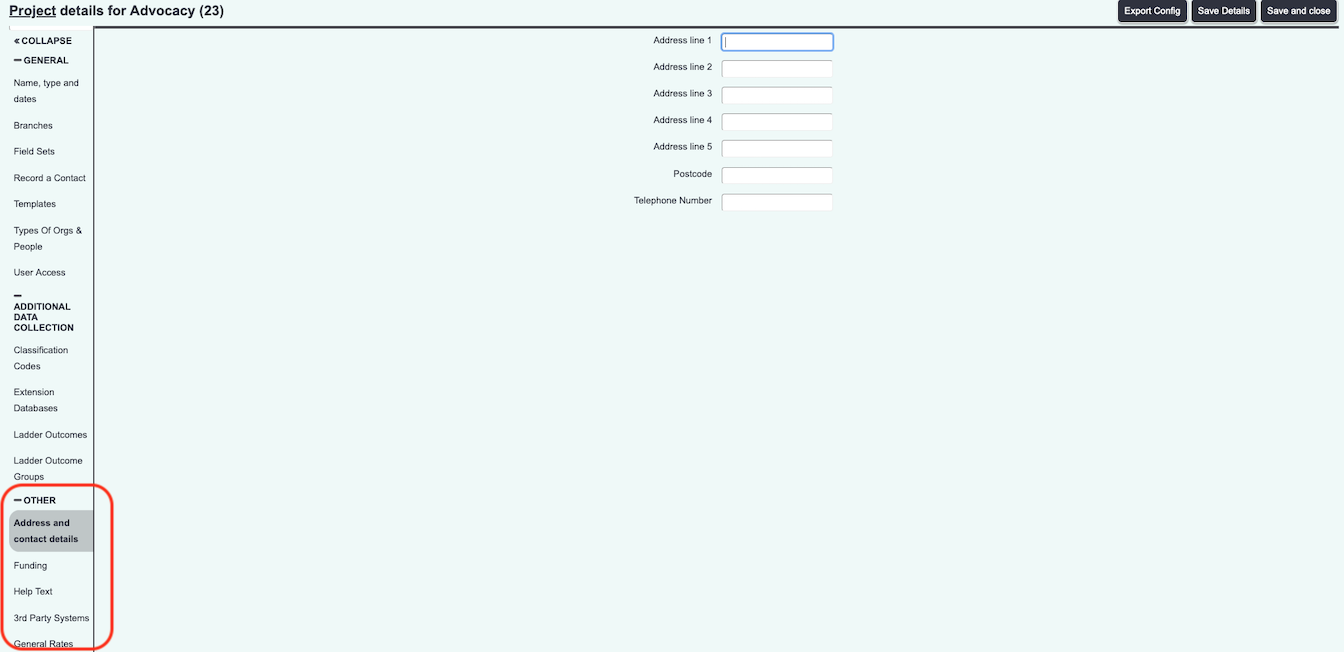
Address and Contact Details
- Address line 1 - This address is for either information purposes on this page or as an invoice address when using the invoice module.
- Address line 2
- Address line 3
- Address line 4
- Address line 5
- Postcode
- Telephone Number
Funding
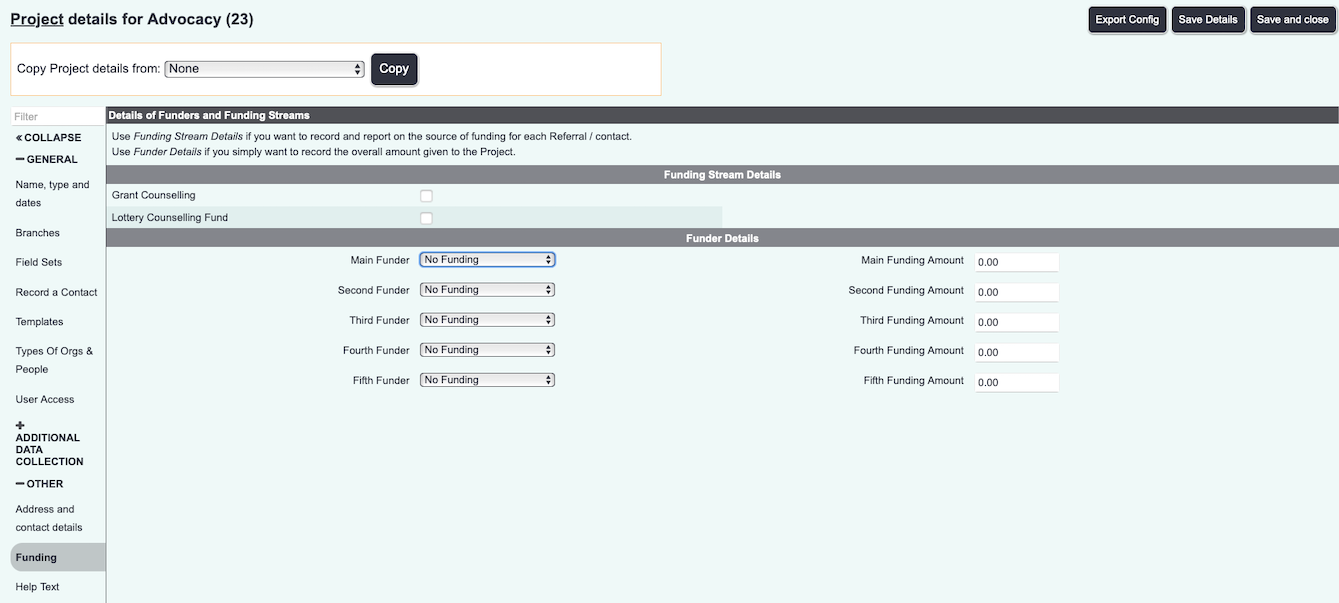
The Funding Section allows you to use Project Funding Streams and specify basic details about who funds the project (service).
Funding Streams Details
To select the funding streams (if set up) simply click on the streams required, this will add an additional drop down to the Record A Contact screen.
Funder Details
The Funder Details section is only displayed here and is not reportable. You can select up to 5 Funders and specify the funding amount.
Help Text
Allows you to add text which will be displayed on the Record a Contact Screen.
3rd Party Systems
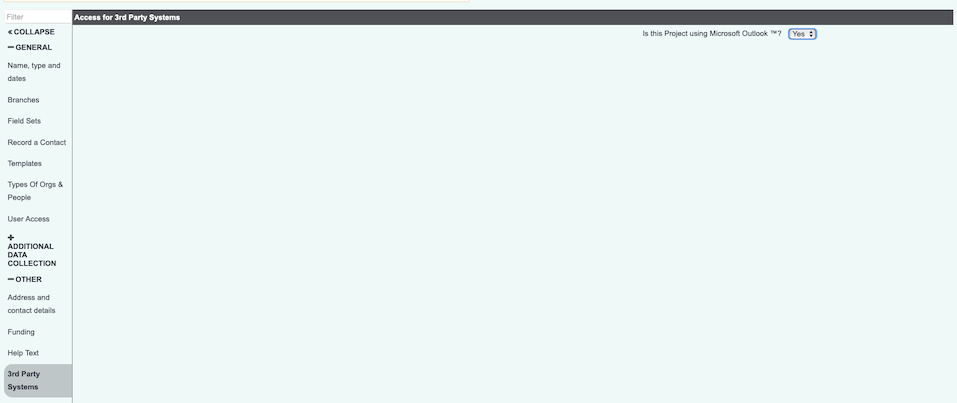
Allows this project to add appointments to individual Outlook calendars. For further details please see Microsoft Office 365 Outlook Calendar Integration for further details.
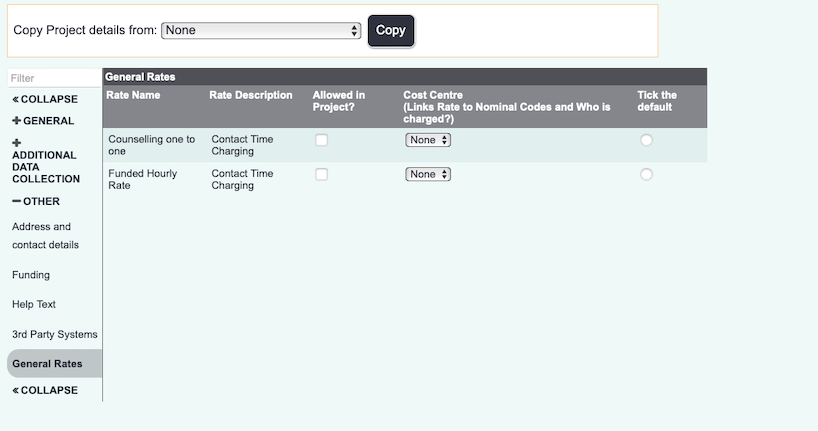
General Rates
If this project is using Charge Rates you can decide which appear and also link them to a cost centre.
Projects for Processes

