Difference between revisions of "Standard Letter Templates"
(→Saving) |
|||
| (27 intermediate revisions by 4 users not shown) | |||
| Line 1: | Line 1: | ||
[[File:helpheader_small.png|right]] | [[File:helpheader_small.png|right]] | ||
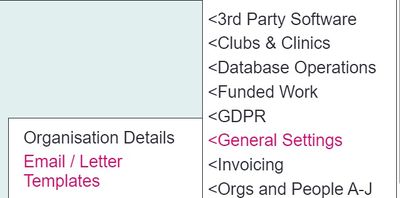
| − | [[File: | + | [[File:letter_templates1.jpg|400px|alt="a screenshot of the email / letter templates button highlighted in the admin menu."]] |
| − | + | Email / Letter Templates can be used to produce letters or emails to send to people or organisations. These templates can be generated via [[Letters and Communication]] section of a record or by using the [[Blue Folder Lookup]] in conjunction with a [[Data Extraction/Mail Merge]] format. | |
| + | |||
| + | NOTE: | ||
| + | When using the Mail merge option on the Blue Folder Lookup, the system will create a letter for all people on the report who have consented to receiving letters. There is no option for further filtering or editing of the recipients list beyond what a Charitylog report is able to produce. | ||
| + | It is therefore important to ensure you are able to achieve a precise list of recipients using the reports. Anything that requires further filtering in excel will need to be processed (email or printed letters) outside Charitylog. | ||
| + | {{#ev:youtube|Qdc733Lo7nQ|790}} | ||
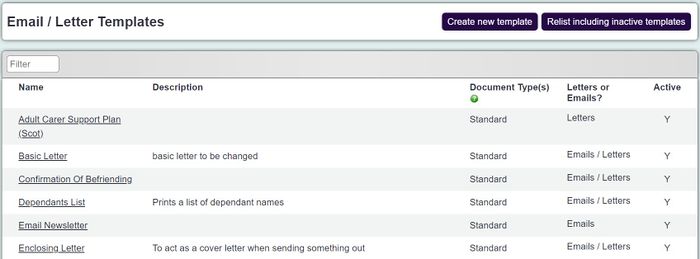
On the first page you will be displayed a list of existing templates. | On the first page you will be displayed a list of existing templates. | ||
| − | [[File: | + | [[File:letter_templates2.jpg|700px|alt="a screenshot of the email / letter templates list."]] |
To edit an existing template click on the name or click create new to set up a new one. | To edit an existing template click on the name or click create new to set up a new one. | ||
| Line 13: | Line 18: | ||
At the top you can copy an existing template. Select the template to copy from the drop down and click Copy. Please not that clicking copy will lose any changes already made. | At the top you can copy an existing template. Select the template to copy from the drop down and click Copy. Please not that clicking copy will lose any changes already made. | ||
| − | [[File: | + | [[File:letter_templates3.jpg|700px|alt="a screenshot of the email / letter templates copy option which is a drop down with a 'copy' button."]] |
| + | |||
| + | ===General Settings=== | ||
| − | |||
| − | [[File: | + | [[File:letter_templates4.jpg|800px|alt="a screenshot of the email / letter templates general settings section, including the fields listed below."]] |
| − | * ''' | + | * '''Name''' - Specify the name of the template, this will be selected by users. |
* '''Description''' - Enter a description to say what the template is used for. | * '''Description''' - Enter a description to say what the template is used for. | ||
* '''Type''' - Specify the type of template. This will be made available to the relevant pages and options depending on the mailout require/selected. | * '''Type''' - Specify the type of template. This will be made available to the relevant pages and options depending on the mailout require/selected. | ||
| Line 27: | Line 33: | ||
===Letter Only Parameters=== | ===Letter Only Parameters=== | ||
| − | [[File: | + | [[File:letter_templates5.jpg|800px|alt="a screenshot of the letter only settings, including the fields below."]] |
* '''Letter default font face''' - This sets the font for the header section only. | * '''Letter default font face''' - This sets the font for the header section only. | ||
| Line 42: | Line 48: | ||
* '''Use full name or initials for address?''' - Specify how the recipients name is displayed. | * '''Use full name or initials for address?''' - Specify how the recipients name is displayed. | ||
| − | + | ===Salutation and Addressee=== | |
| − | |||
| − | |||
| − | = = | ||
| − | = | ||
| − | |||
| − | |||
| − | |||
| − | |||
| − | |||
| − | |||
| − | |||
| − | |||
| − | |||
| − | |||
| − | |||
| − | |||
| − | |||
| − | |||
| − | |||
| − | |||
| − | |||
| − | |||
| − | |||
| − | |||
| − | |||
| − | |||
| − | |||
| − | |||
| − | |||
| − | |||
| − | |||
| − | |||
| − | |||
| − | |||
| − | |||
| − | |||
| − | |||
| − | |||
| − | |||
| − | |||
| − | |||
| − | |||
| − | |||
| − | |||
| − | |||
| − | |||
| − | |||
| − | |||
| − | |||
| − | |||
| − | |||
| − | |||
| − | |||
| − | |||
| − | |||
| − | |||
| − | |||
| − | |||
| − | |||
| − | |||
| − | |||
| − | |||
| − | |||
| − | |||
| − | |||
| − | |||
| − | |||
| − | |||
| + | [[File:letter_templates6.jpg|800px|alt="a screenshot of the letter only settings, including the fields below."]] | ||
| − | + | * '''Automatically inserted salutation''' - Select the required Salutation. | |
| + | * '''Automatically inserted salutation (email only)''' - Select the name format for the salutation. | ||
| + | * '''Send to 3rd party recipient instead?''' - Specify if this template can be sent to a 3rd party. This allows a section to select the 3rd party before sending. | ||
| + | ===Edit the Document Template=== | ||
| − | + | [[File:letter_templates7.jpg|800px|alt="a screenshot of the body of the letter / email templates."]] | |
| + | [[File:letter_templates8.jpg|800px|alt="a screenshot of the body of the letter / email templates."]] | ||
| + | [[File:letter_templates9.jpg|800px|alt="a screenshot of the body of the letter / email templates."]] | ||
| + | [[File:letter_templates10.jpg|800px|alt="a screenshot of the body of the letter / email templates."]] | ||
| − | + | At the top of this section you will be displayed the headers section (if selected) or the alternate header if selected. Use the [[Text Editor]] to configure the alternate header. If you are using images it is recommended that the image is resized before it is uploaded as the browser may adjust the page to fit the image, causing the text to be smaller. | |
| − | |||
| − | |||
| − | |||
| − | + | * '''Subject line''' - The subject line is for email subject. | |
| + | * '''Body section''' - This is the main section for a letter/email. Use the [[Text Editor]] to format the text. | ||
| + | * '''Show closure section?''' - This gives the option to include the valediction line and signature name and position. | ||
| + | * '''Printed 'from' name''' - Type the name of the person signing the letter. | ||
| + | * '''Printed 'from' title/position''' Type the signing person's position. | ||
| + | * '''Footer section''' - The footer section is displayed at the base of a letter or after the signature on an email. Use the [[Text Editor]] to format the text. | ||
| − | + | ===Saving=== | |
| + | [[File:letter_templates11.jpg|400px|alt="a screenshot of the 'save' buttons."]] | ||
| − | --- | + | * '''Save Details''' - Saves changes and remains on the template. |
| − | + | * '''Save and Close''' - Saves changes and returns to the list of templates. | |
| + | * '''Save and Show print preview''' - Displays the full document. The actual printed version will vary due browser behaviour and printer settings and margins. | ||
Latest revision as of 09:31, 21 May 2024
Email / Letter Templates can be used to produce letters or emails to send to people or organisations. These templates can be generated via Letters and Communication section of a record or by using the Blue Folder Lookup in conjunction with a Data Extraction/Mail Merge format.
NOTE: When using the Mail merge option on the Blue Folder Lookup, the system will create a letter for all people on the report who have consented to receiving letters. There is no option for further filtering or editing of the recipients list beyond what a Charitylog report is able to produce. It is therefore important to ensure you are able to achieve a precise list of recipients using the reports. Anything that requires further filtering in excel will need to be processed (email or printed letters) outside Charitylog.
On the first page you will be displayed a list of existing templates.
To edit an existing template click on the name or click create new to set up a new one.
At the top you can copy an existing template. Select the template to copy from the drop down and click Copy. Please not that clicking copy will lose any changes already made.
Contents
General Settings
- Name - Specify the name of the template, this will be selected by users.
- Description - Enter a description to say what the template is used for.
- Type - Specify the type of template. This will be made available to the relevant pages and options depending on the mailout require/selected.
- User/group access - Specify which Group Access groups can use and view this template, this also is used as a default when the letter/email is created. The greyed out box will display groups that automatically override this option and will see all templates, letters and email (see Group Access for details]].
- Active - Specify if this template is active, when set to yes will be available for new letters or emails.
Letter Only Parameters
- Letter default font face - This sets the font for the header section only.
- Letter default font size - This sets the font size for the header section only.
- Use letter header section - Specifies what header is to be used.
- Yes-Standard - This will use the system logo or alternate logo specified by the parameters.
- Yes-Use alternate - This allows the use of a custom header and image which is created in the Alternate Header section. The Alternate Header is only used for this template.
- No - This removes the header logo and alternate header section
- Including logo [of width]? - Used with standard header, specify the required location and width of the logo.
- Alternate image path for logo - Specify the web URL of an alternate logo, this will override the system logo. You can upload logos and images via System Uploads to get URLS to use.
- Window (in envelope) location - Specify the start location (top left corner) of your envelopes windows if used. This will adjust the address accordingly. Please note that some browsers will include margins and resize print outs.
- Show/print our address - Specify if you wish to use the address from Organisation Details.
- Show/print recipient's address - Specify if you wish to include the recipients address.
- Use full name or initials for address? - Specify how the recipients name is displayed.
Salutation and Addressee
- Automatically inserted salutation - Select the required Salutation.
- Automatically inserted salutation (email only) - Select the name format for the salutation.
- Send to 3rd party recipient instead? - Specify if this template can be sent to a 3rd party. This allows a section to select the 3rd party before sending.
Edit the Document Template
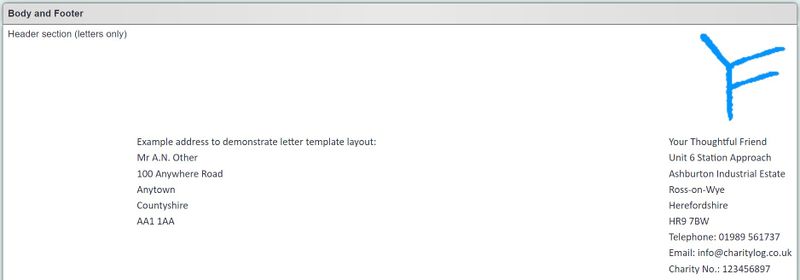
At the top of this section you will be displayed the headers section (if selected) or the alternate header if selected. Use the Text Editor to configure the alternate header. If you are using images it is recommended that the image is resized before it is uploaded as the browser may adjust the page to fit the image, causing the text to be smaller.
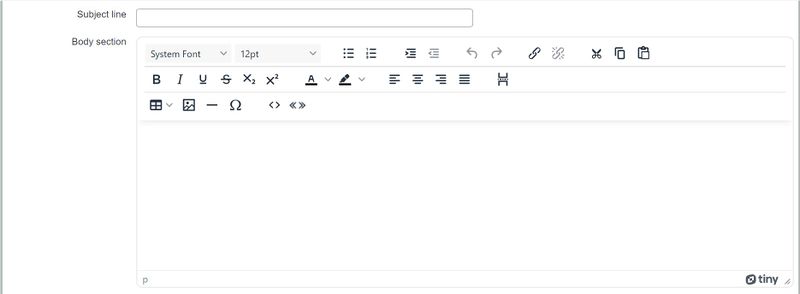
- Subject line - The subject line is for email subject.
- Body section - This is the main section for a letter/email. Use the Text Editor to format the text.
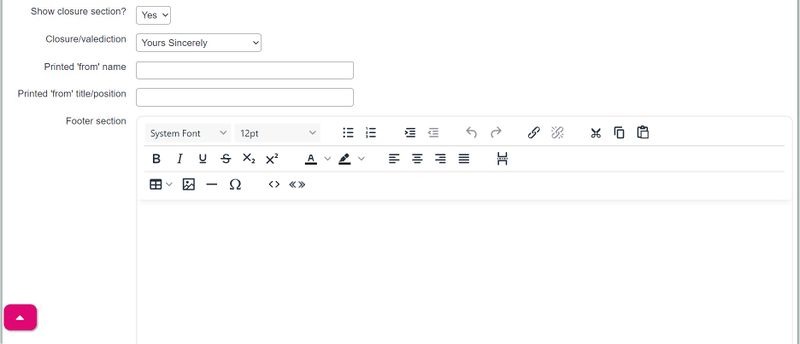
- Show closure section? - This gives the option to include the valediction line and signature name and position.
- Printed 'from' name - Type the name of the person signing the letter.
- Printed 'from' title/position Type the signing person's position.
- Footer section - The footer section is displayed at the base of a letter or after the signature on an email. Use the Text Editor to format the text.
Saving
- Save Details - Saves changes and remains on the template.
- Save and Close - Saves changes and returns to the list of templates.
- Save and Show print preview - Displays the full document. The actual printed version will vary due browser behaviour and printer settings and margins.

