Difference between revisions of "KPI Report Designer"
| Line 40: | Line 40: | ||
| − | + | Then click "Continue to Next Step". | |
| − | |||
| + | [[File:reports_38.png|border]] | ||
| − | |||
| − | |||
| − | |||
| − | |||
| − | |||
| − | |||
| − | |||
| − | |||
| − | |||
Revision as of 16:48, 1 December 2015
Location in standard build: Reports > KPI Report Designer
The KPI Report Designer allows you to produce reports from the data in your Charitylog system; specifically, reports about activity. This could be contacts with people, Club & Clinic attendances, Support Worker visits, and so on. All activity is entered with a date, and is entered under a Project. Therefore, the KPI Report Designer lets you start your report by setting a date range and selecting one or more Projects; you can then proceed to say which KPIs (Key Performance Indicators) you want to know.
The KPI Report Designer is one of the three main reporting tools available in Charitylog, the other two being Data Extractions and Blue Folder Lookups. By using these together, you can export spreadsheets showing any data from your system, and then interpret them using Excel.
Contents
KPI Report Designer - process
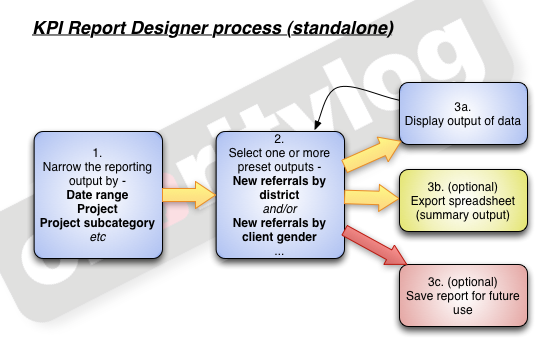
Start the process by selecting the date range and project(s) you wish to report on. Then, tell the system what data you want to see. You can proceed to step 3 and look at the data; you may now want to go back to step 2, tweak some aspects of your request, and return to step 3 again. Once you are happy with the output, you can produce a spreadsheet. If you are going to need to run this report again (a quarterly statistics report, for example), you can save the report, and return to it at a later date, changing only the date range.
Step 1: set the date range and Project(s)
Open the "Reports" submenu, then click on the "KPI Report Designer" menu item.
This will take you to the first step of the KPI Report Designer.
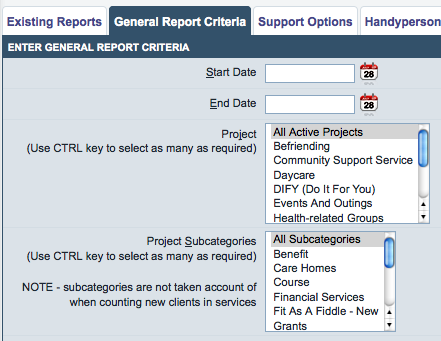
General Report Criteria
Choose your date range and Project(s). You can also narrow the report further by Project Subcategory.
Then click "Continue to Next Step".
Step 2: select KPI items to print
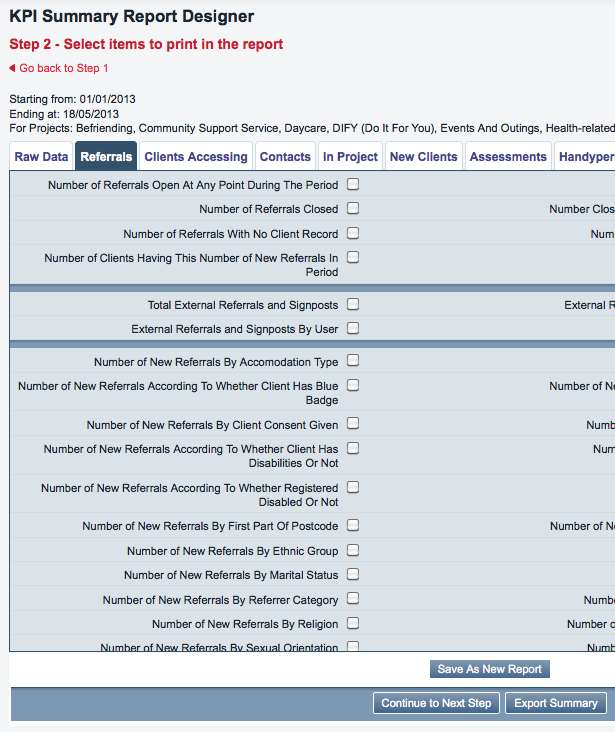
The screen you will now see has a series of tabs, with many tick boxes displayed for each tab. (section of page shown)
The tabs group the output options, and each output option (usually) is one "thing by thing" - "new referrals by district" being an example; one Key Performance Indicator, or KPI. The tabs are as follows.
Raw Data tab
General data extractions - so these are not something by something else - rather, they will be a full data spreadsheet, which you can do with as you wish.
Referrals tab
These are to do with the Referrals on your system - the available items are mainly focused on new referrals, but there are also items for closed referrals and external referrals.
Clients Accessing tab
These items focus on the clients themselves, so even if a client has several referrals ongoing, they will only be counted once.
Contacts tab
These items focus on contacts with clients, so one client who has been into your office for four visits would be counted four times, etc.
In Project tab
Clients In Project items and Termination-specific items. For more information on the concept of "Clients In Project", see the Projects chapter.
New Client tab
Items relating to clients that were new to the selected Projects in the time period.
Assessments tab
Items relating to Assessments.
Handyperson tab
Items relating to the Handyperson module.
Clubs & Clinics tab
Items relating to Clubs and Clinics.
Support tab
Items relating to the Support Worker module.
What to do if the KPI you want is not available
If the option you need is not listed and you feel it should be, please call our support team on 01989 763 691. Adding KPIs is usually relatively easy, and if there is a KPI you need that we do not currently provide, the chances are that other customers would make use of it too. The support team may be able to suggest another way to obtain the data you need, but it is not uncommon for KPI requests to be included in the next release.
Step 3: View the output (Summary Report Results)
Once you have selected the KPIs you want, there are three options to take.
- You can click the "Export Summary" button, which will export a spreadsheet with the resulting numbers on (note that these will only be numbers, and will not show the clients behind the numbers - so if you have selected "Number of new referrals", and there are 367, you will simply get a spreadsheet output with the number "367" in it, along with details of the associated date range and projects).
- You can continue to see the detail behind the numbers, using the "Continue to Next Step" button.
- You can save the report for later use (but you will probably want to do step 2 first).
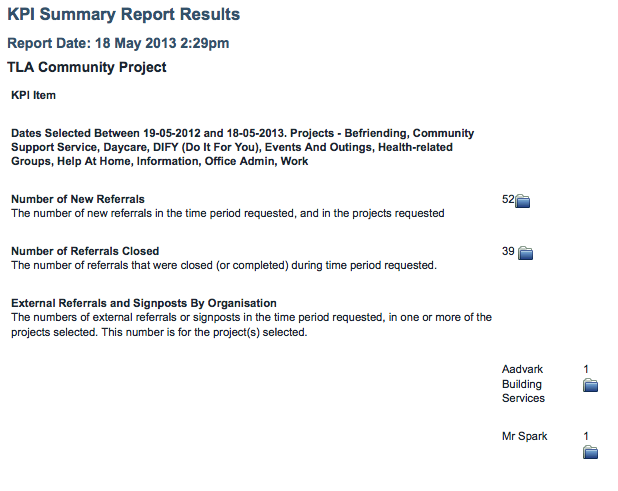
So if you continue to the next step, you will see a screen like this one.
In this case, the KPIs requested were:
- Number of new referrals
- Number of referrals closed
- Number of external referrals/signposts, by organisation referred to
So you can see that there were 52 new referrals, 39 close referrals, and 2 external referrals - one to Aardvark Building Services, and one to Mr Spark.
If these numbers give you the data you need, you can print this page, or go back to step 2 (by clicking the "Close Report" button) and export the summary spreadsheet. Alternatively, you may want to change the KPIs you have requested before saving the report.
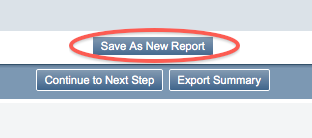
Once you are happy with the output, you can click the "Save As New Report" button at step 2:
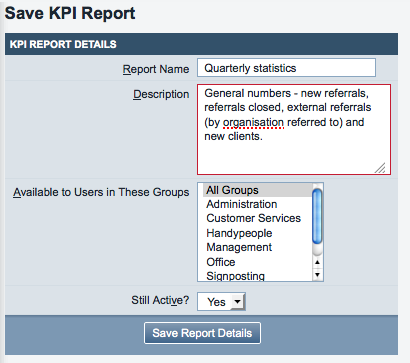
Save the report, giving it a name, description (optional), and setting access control by user group:
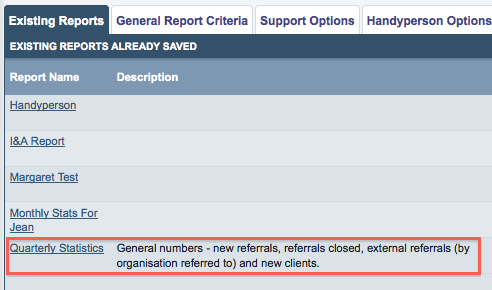
Your new report will now be displayed at step 1 when you return to the KPI Report Designer.
Rob Kay - manual author (talk) 16:44, 1 December 2015 (GMT)

